How to Create and Edit Ads in MGID Ads?
This article covers the process of creating and editing Ads (Creatives) in the MGID Ads system.
Upload Ads in Bulk
Edit Ads
Video Guide
Create Ads
To create ads, follow these steps:
- Navigate to the Campaigns tab.
- Click the +Create button.
- Select Ads from the drop-down list.
/Advertisers/1.%20English%20language%20articles/How%20to%20Create%20and%20Edit%20Ads%20in%20MGID%20Ads/Create_and_Edit_Ads_GIF.gif?width=670&height=369&name=Create_and_Edit_Ads_GIF.gif)
4. Fill in the following fields:
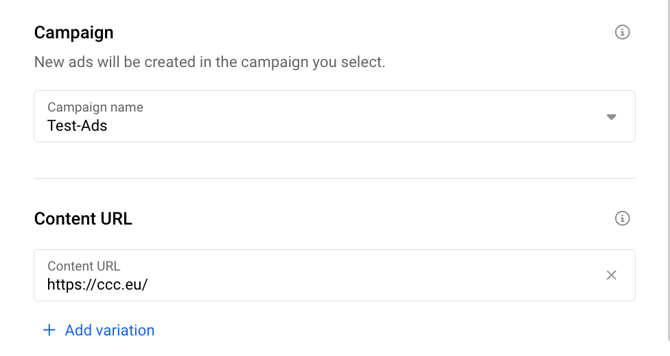
- Campaign name: Choose a campaign name for creatives from the dropdown list. Select the campaign where you want to create the ad.
- Content URL: Specify the link to your landing page (product on your website) in this field with https://

- Title: Enter a title that is short, catchy and specific to the product or service. Be creative, interesting and original. Avoid spelling mistakes. Do not use ALL CAPS or multiple exclamation marks.
- Media: Select exciting and bright pictures. Choose an image that looks clear, even when reduced in size. Try to choose an image that fits your product and works with your advertising title and text. You could experiment with simple photo editor graphics to add a logo or SALE, but don’t overburden the advert.
Mind the requirements for media files:
- Allowed formats are jpg, jpeg, png, mp4, mov, gif.
- The minimum file size is 492x328 px (however 600х400 px is the optimal and desired image parameter)
- Images must be up to 5 mb.
- Videos and gifs must be up to 15 sec.
/Advertisers/1.%20English%20language%20articles/How%20to%20Create%20and%20Edit%20Ads%20in%20MGID%20Ads/Create_and_Edit_Ads_3.png?width=340&height=184&name=Create_and_Edit_Ads_3.png)
- Description: Use this field for a detailed description of your product or service. You can specify discounts or special offers, unique benefits of goods and services, giving users another reason to convert clicks and purchases. Please note that the description won't be displayed in some widgets, so your title should make sense and convey the main idea without it.
- Call to action: Select from the dropdown list. It could help increase conversions, sales and facilitates product promotion.
/Advertisers/1.%20English%20language%20articles/How%20to%20Create%20and%20Edit%20Ads%20in%20MGID%20Ads/Create_and_Edit_Ads_4.png?width=274&height=279&name=Create_and_Edit_Ads_4.png)
You can see the examples of how your ad will look on a website on the right side. Save your ad before starting the campaign.
/Advertisers/1.%20English%20language%20articles/How%20to%20Create%20and%20Edit%20Ads%20in%20MGID%20Ads/Create_and_Edit_Ads_5.png?width=670&height=269&name=Create_and_Edit_Ads_5.png)
Upload Ads in Bulk
To create new ads in the system, you can use the bulk upload functionality. Each file can contain up to 100 rows. If you need to upload more than 100 rows, please split your data into multiple files.
Follow these steps to upload ads in bulk:
- To bulk upload your creatives in the MGID Ads platform, click the Upload icon located under the Create Ads form.
The pop-up window includes the template to make sure your CSV works as intended.
/Advertisers/1.%20English%20language%20articles/How%20to%20Create%20and%20Edit%20Ads%20in%20MGID%20Ads/upload_in_bulk_1.png?width=670&height=400&name=upload_in_bulk_1.png)
2. To prepare your data for uploading, click the provided link to download the CSV template.
/Advertisers/1.%20English%20language%20articles/How%20to%20Create%20and%20Edit%20Ads%20in%20MGID%20Ads/upload_in_bulk_2.png?width=670&height=403&name=upload_in_bulk_2.png)
Fill out the template columns and ensure all necessary fields are correctly formatted:
- URL: include the URL of the ads you want to upload. This is the only mandatory field;
- Title, ImageUrl, and Description Columns: add corresponding content for each URL if available;
- CTA: manually include Call-to-Action text if required.
If you leave the optional fields—Title, ImageUrl, Description, and CTA—blank, the system will automatically retrieve the Title and ImageUrl data from the metadata of the provided URL.
3. After preparing your CSV file, return to the platform and upload it.
4. Once uploaded, you’ll see a preview of all the creatives. Review each creative to ensure accuracy. Make any necessary edits to titles, images, descriptions, or CTAs.
5. Save your creatives to complete the upload process.
To avoid errors, double-check your CSV file format before uploading.
If you're relying on the system to auto-generate optional fields, make sure all URLs are valid and contain metadata.
Edit Ads
1. Navigate to the list of ads for the relevant advertising campaign by clicking on the campaign name.
/Advertisers/1.%20English%20language%20articles/How%20to%20Create%20and%20Edit%20Ads%20in%20MGID%20Ads/Create_and_Edit_Ads_6.png?width=670&height=107&name=Create_and_Edit_Ads_6.png)
2. Click Edit under the Ad Preview option. You can change the advertising link, adjust the product description and pricing information in the opening form.
/Advertisers/1.%20English%20language%20articles/How%20to%20Create%20and%20Edit%20Ads%20in%20MGID%20Ads/Create_and_Edit_Ads_7.png?width=670&height=242&name=Create_and_Edit_Ads_7.png)
Video Guide