- What is retargeting?
-
What is the Target Type and how can it be applied during the audience creation?
-
How to use the audience when creating or editing a campaign?
1. What is retargeting?
Retargeting is a tool to increase the conversion of an advertising campaign. Retargeting helps you to determine the most valuable visitors from all those who view your site and shows certain advertisements in the MGID network.
2. Benefits of Retargeting
- Audience selection
Retargeting filters can be customized in different ways, e.g. you will be able to target ads only to those who have not completed an online purchase.
- Reach and depth
Whereas other filters narrow your audience, retargeting will allow you to direct your ads only to those interested in your site without significant losses, provided that a sufficient amount of data has been accumulated.
- Maximum purchase probability
Potential customers will see your ad exactly at the moment when they are the most interested in making a purchase.
3. Audiences Functionality
The Audiences functionality further enables launching retargeting campaigns in MGID to target specific visitors. Retargeting campaigns allow you to display ads to visitors who have previously interacted with your site.
4. How to create an Audience?
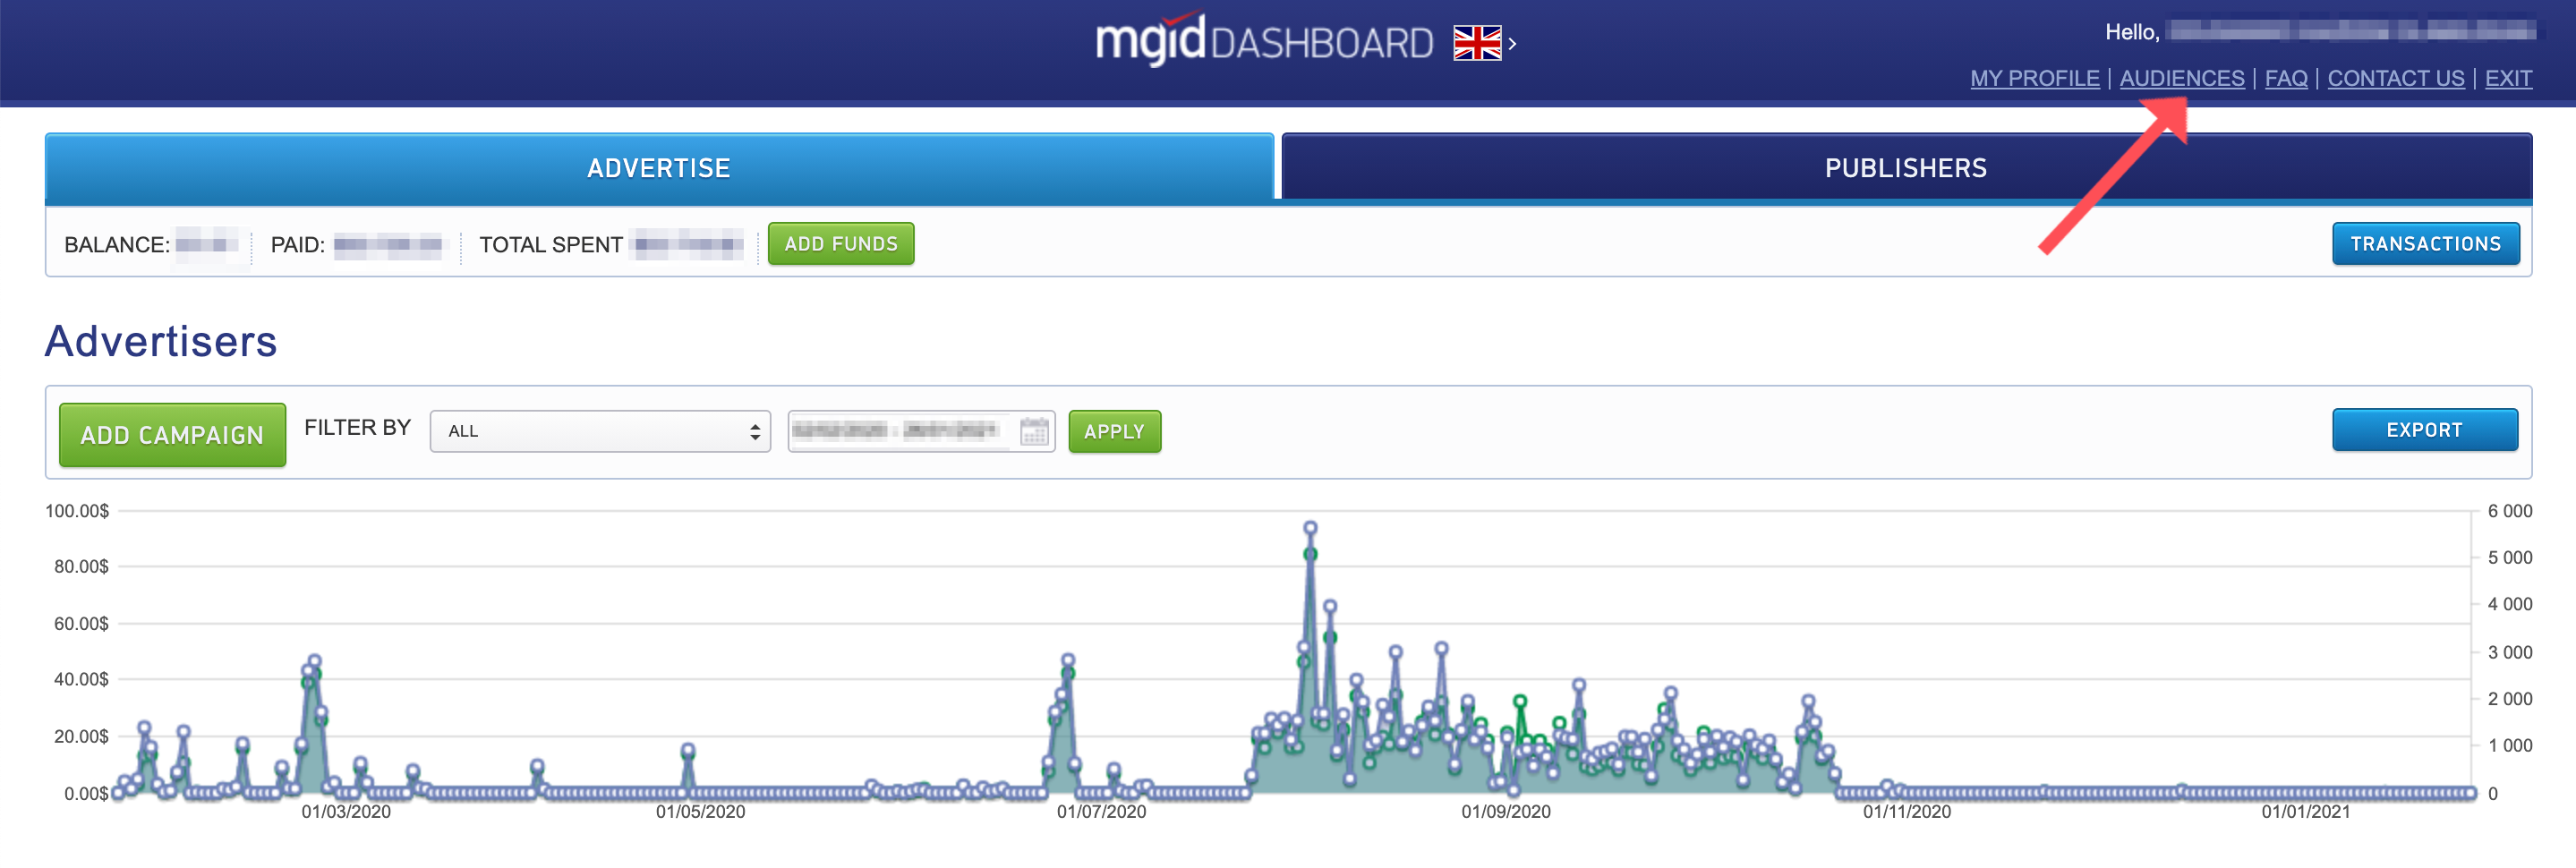
To create an Audience, go to the Audiences section in MGID Dashboard (located in the upper right corner.
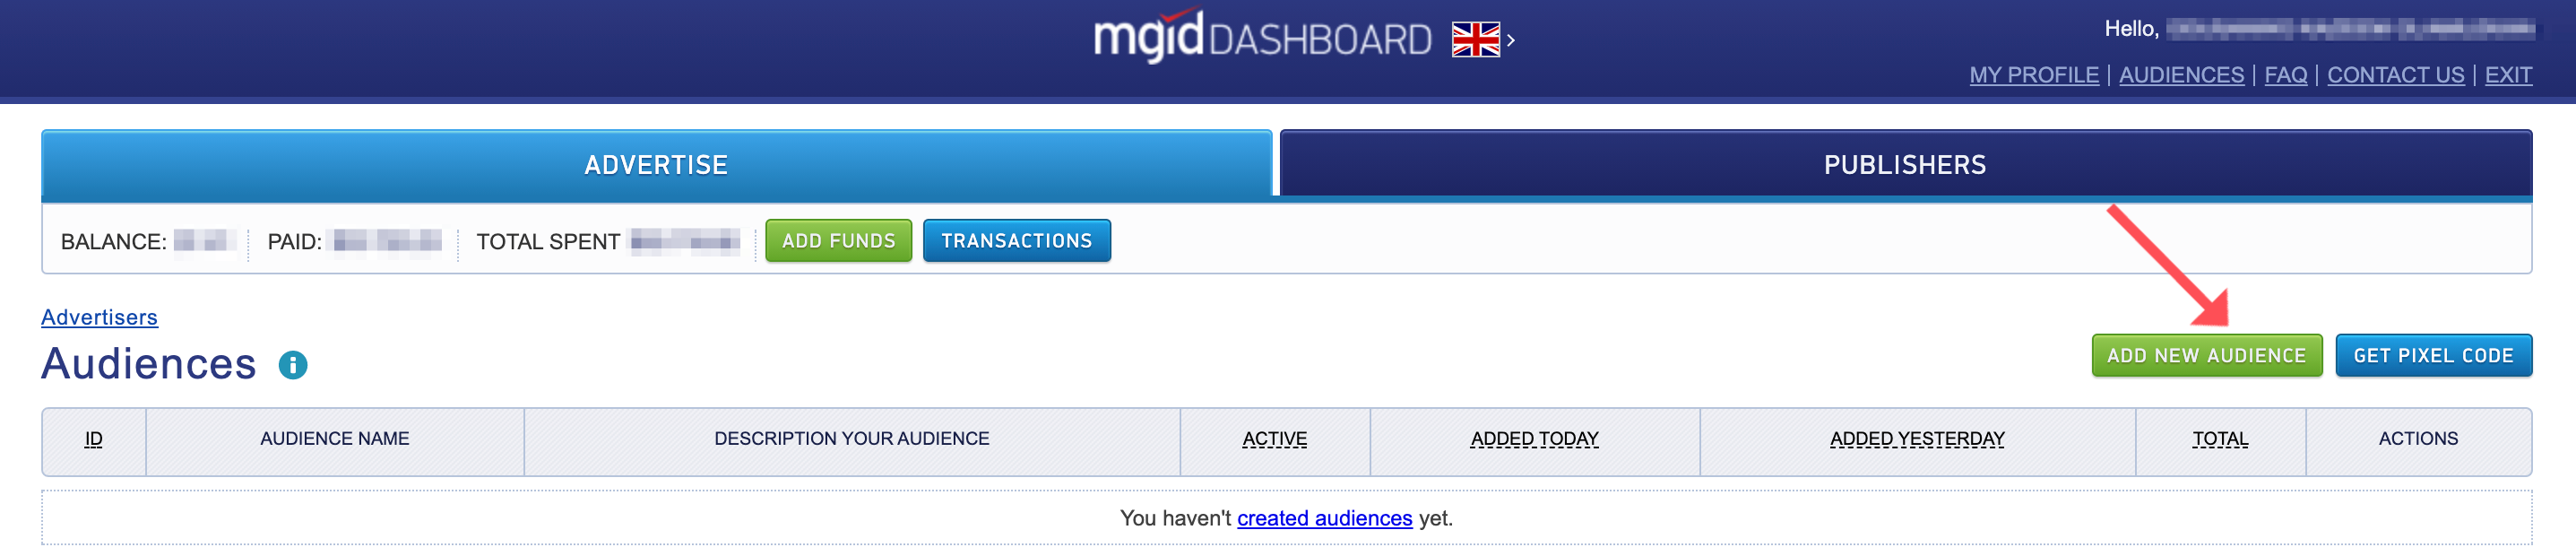
On the section page, click on the Add New Audience button.
When creating an Audience, you should specify:
- Audience name (up to 30 characters)
- Describe your audience (up to 90 characters)
- Target type: on what basis a visitor will be added to the audience
- Period of validity: the duration of the visitor's inclusion in the audience
- You should add conditions for a visitor to be added to the Audience in accordance with the target type chosen in the Settings section.

5. What is the Target Type and how can it be applied during the audience creation?
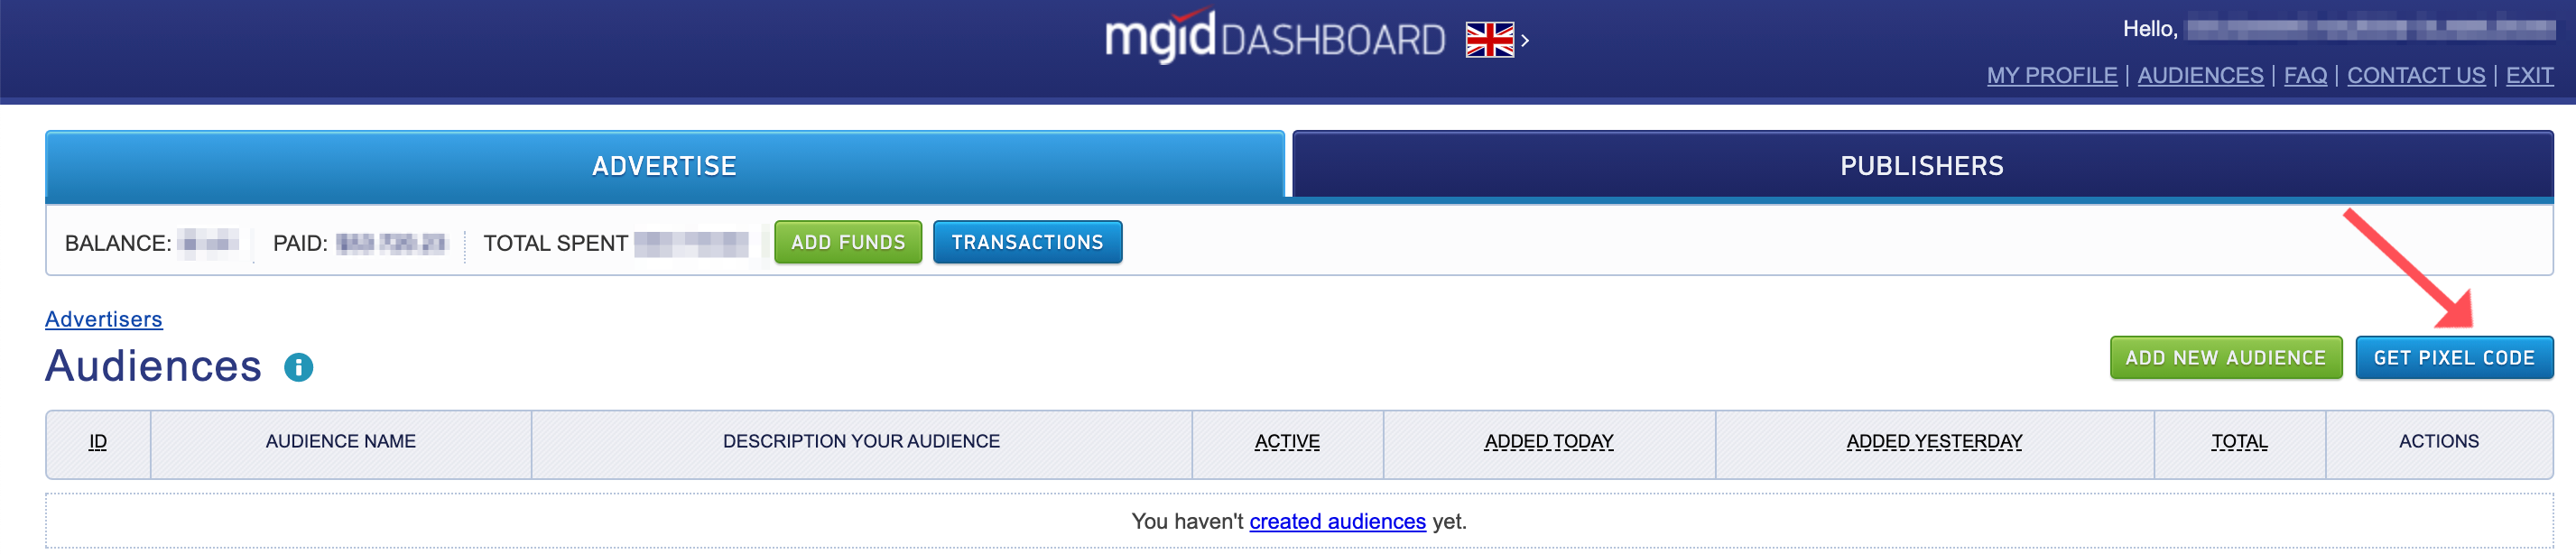
To collect an audience, you should set the MGID pixel on the site (the code should be placed in the <body> on each page of the site). The pixel code can be found in the Audiences section.
To get the code, you should click on the Get pixel code button and copy it from the opening pop-up.
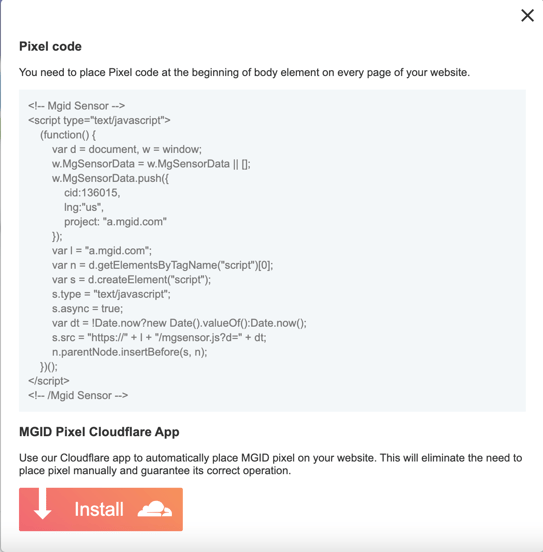
MGID Pixel Code
As an advertiser, you can choose the following target types when creating an Audience:
- Page Link
- JS Event
- Website Visitor
- Ad Clickers
- Ad Viewers
- Existing Targets
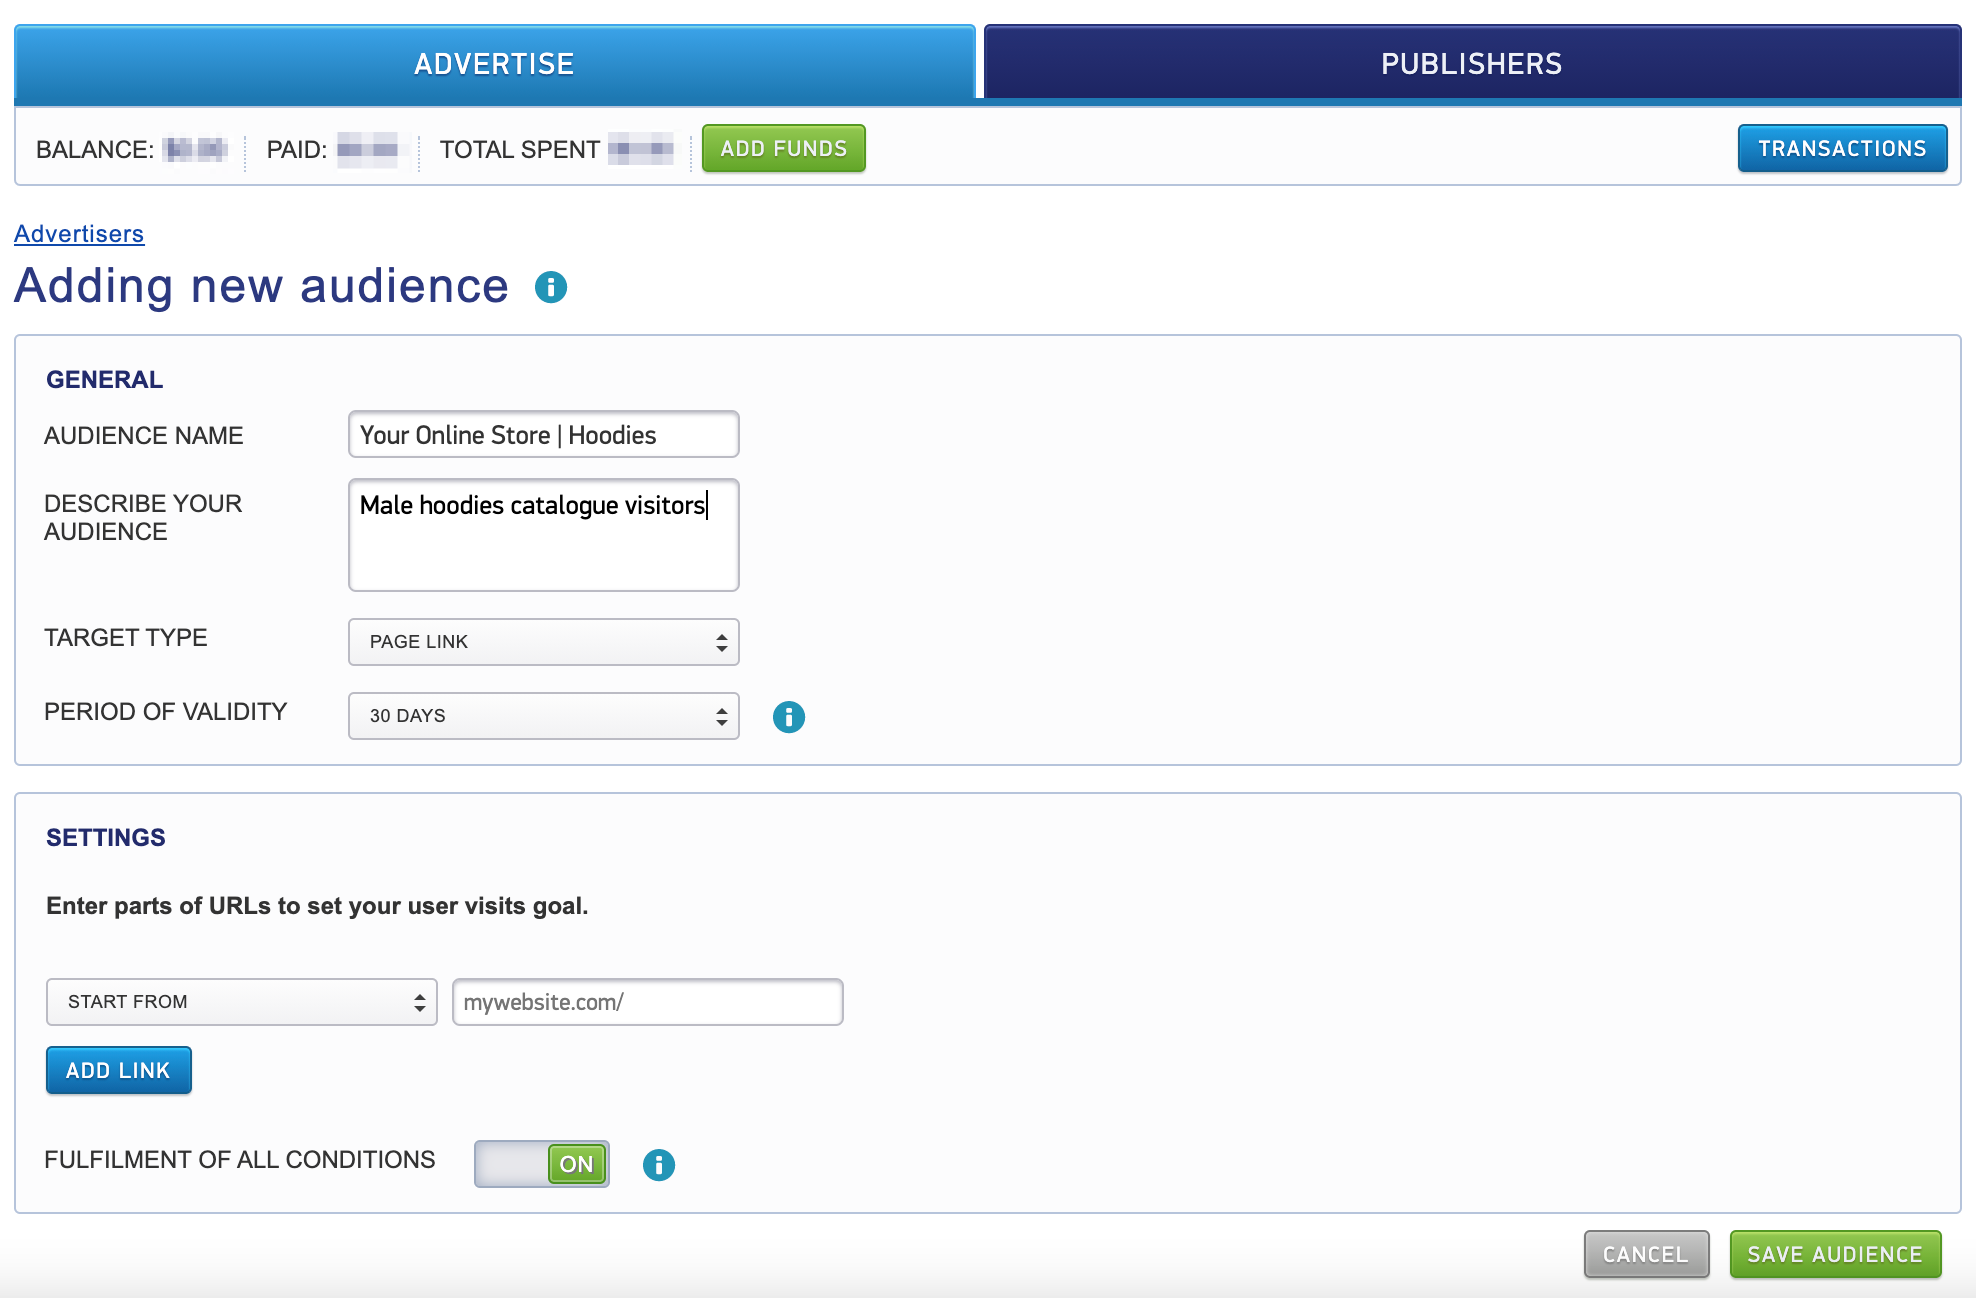
1. Target type = Page Link
When choosing the Page Link target type, you can create a retargeting campaign for users who have visited certain pages of the site (visits are logged using the MGID pixel).
It works as follows.
A user has visited the main page of an e-commerce site, as well as other pages on this site ('/about us', '/checkout', product pages, etc.). When a user visits the MGID partner site, ads of the products they have viewed will be displayed in ad units.
In Audience settings, you can set only parts of the URL (Start from, Contains, Ends with). You can add it to the Audience provided that either one of the conditions is fulfilled, or all of them are fulfilled (there is no limit on the number).
2. Target type = JS Event
This creates a retargeting campaign for users who have performed certain actions on the site (registration, adding an item to the cart, placing an order, etc.).
To set up such a campaign, you should:
- Put the MGID pixel code on the site
- Install the event tracking code
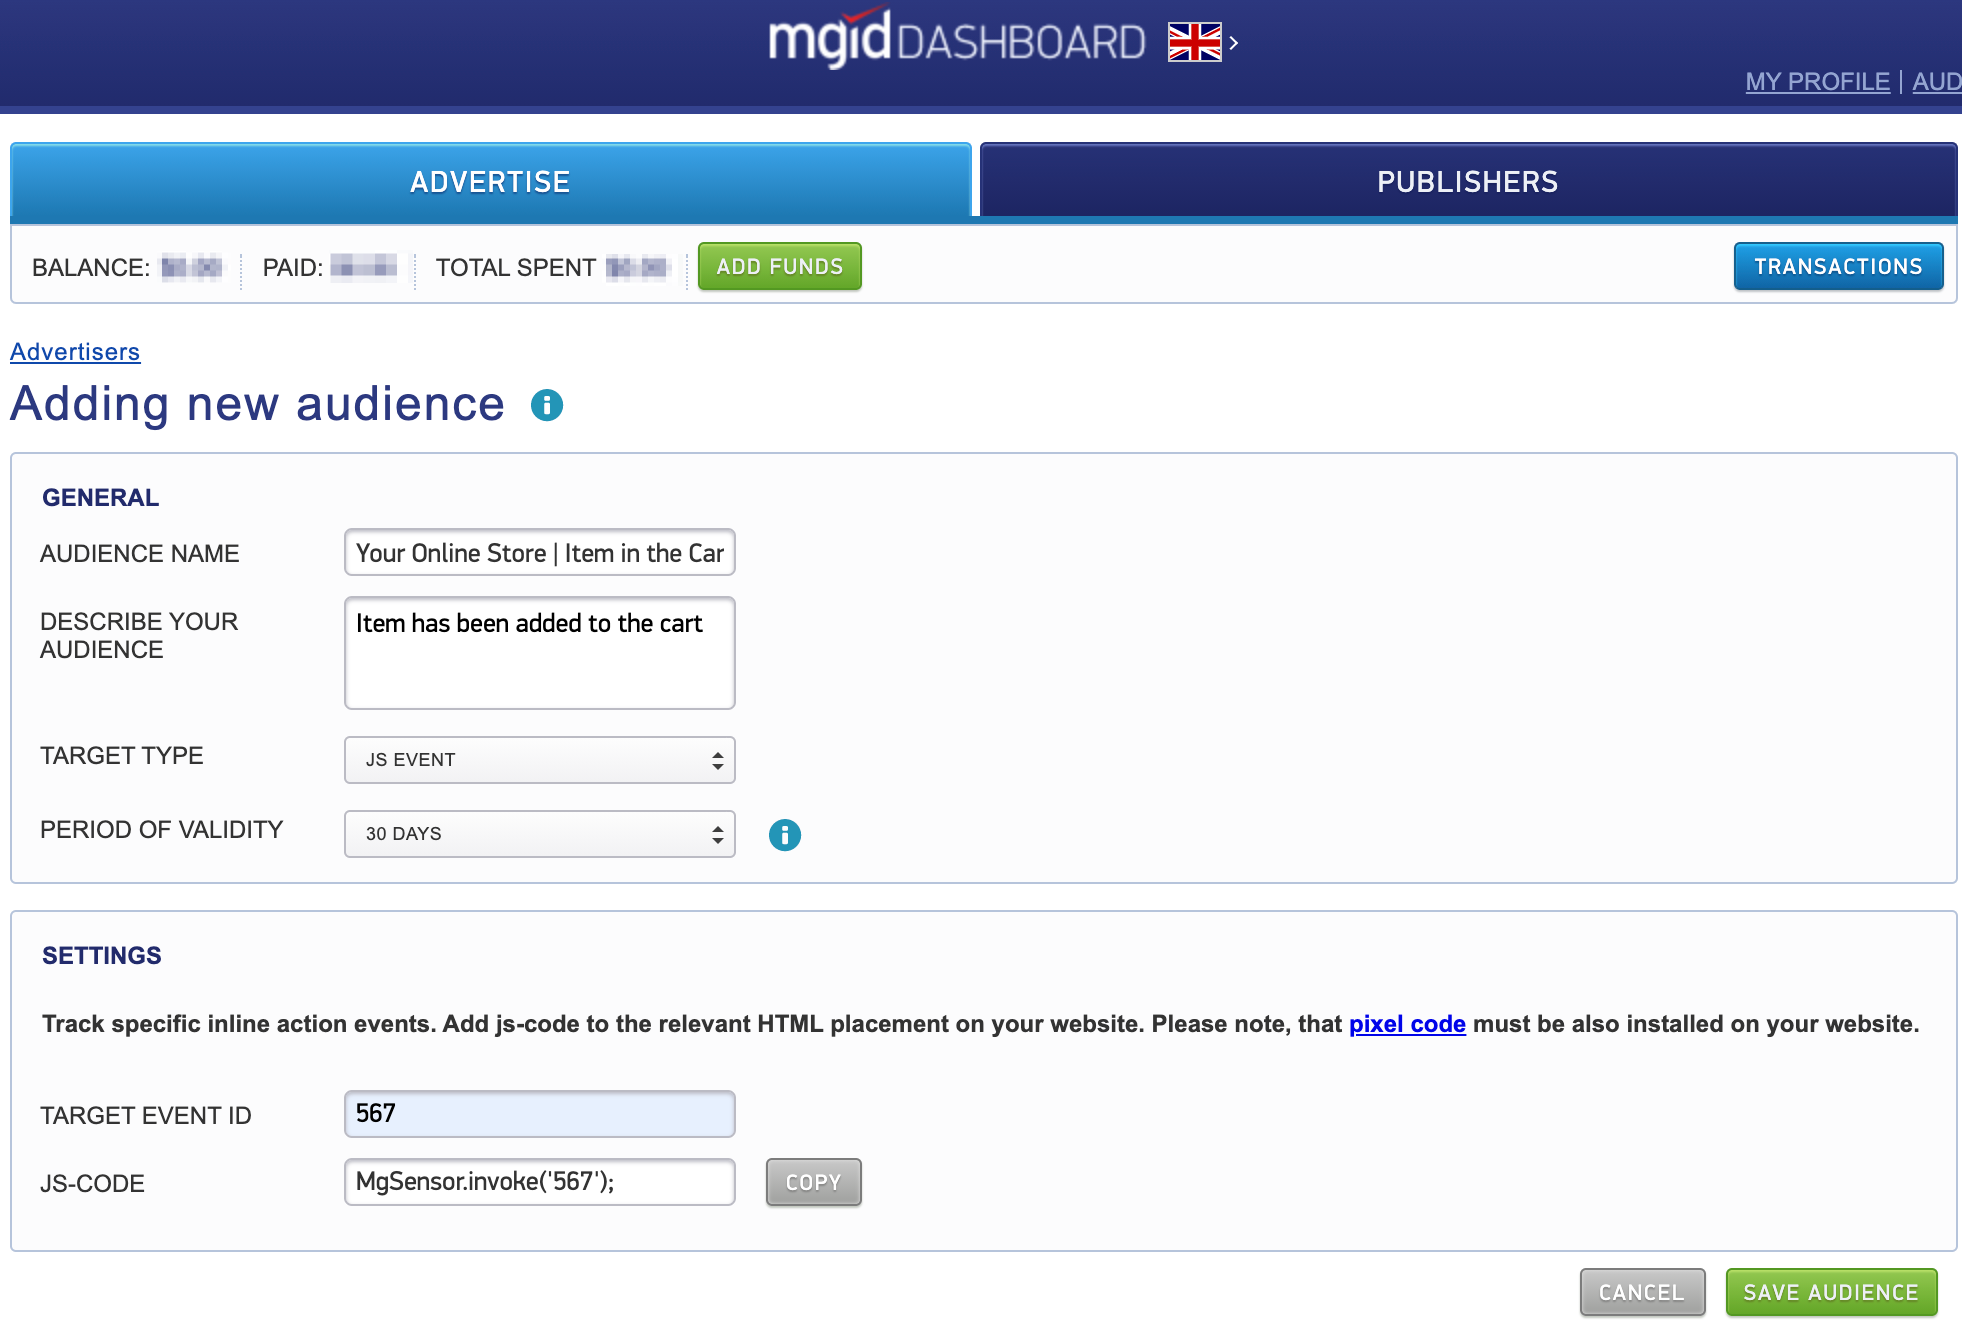
To generate an event tracking code, you should specify an identifier. Then, place the generated code on the site, so it is executed as soon as the desired action is performed (adding to the cart, etc.).
Please note, you can add only one tracked event per audience.
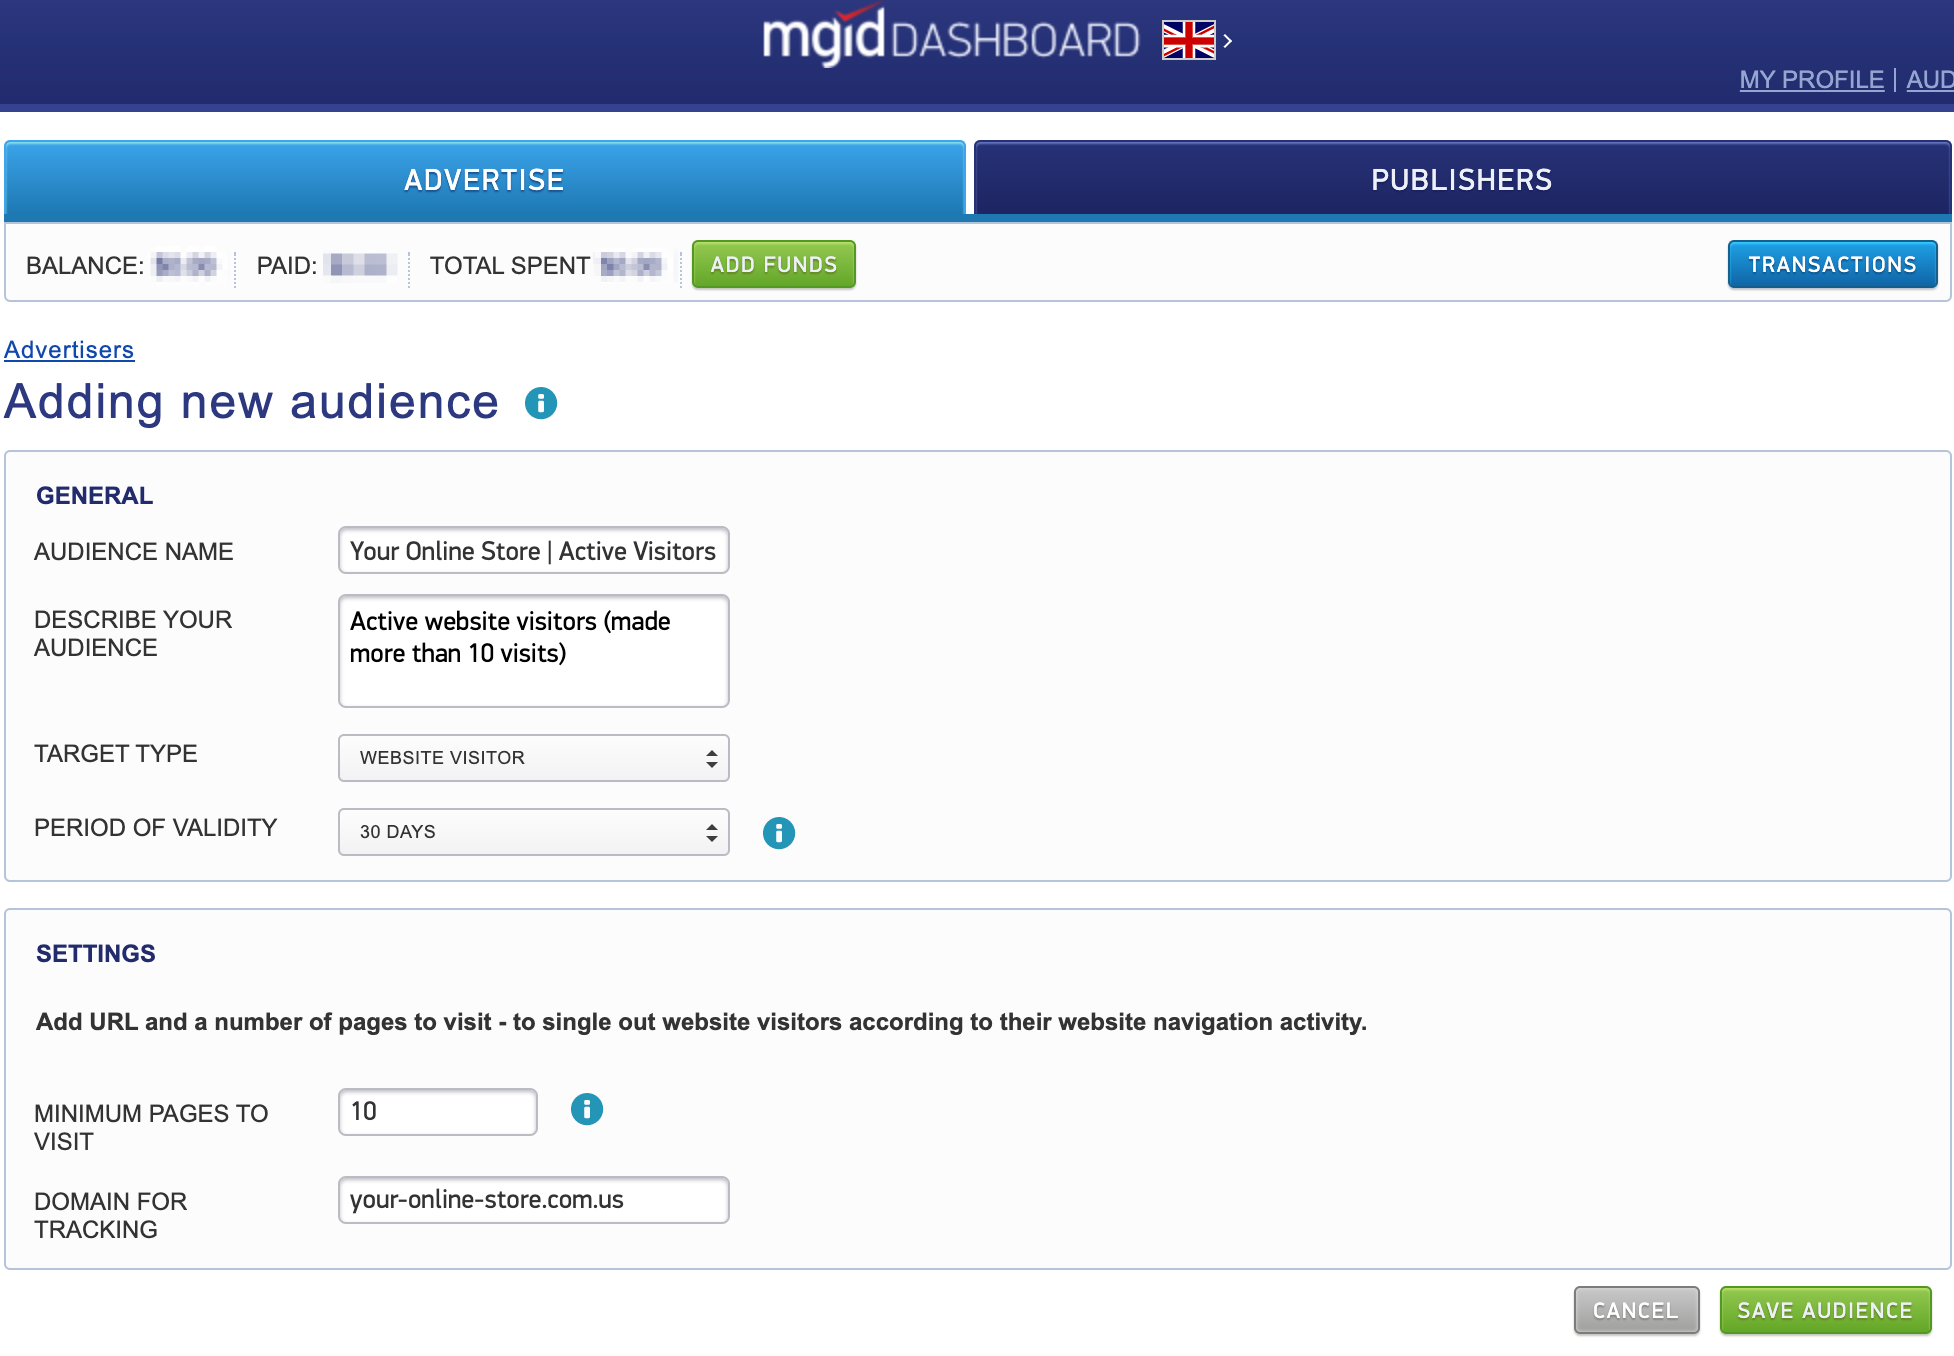
3. Target Type = Website Visitor
As for this target type, you can create an audience that makes up site visitors who have accessed any page, and a condition can be added that specifies a minimum number of visits for a user to be added to the audience. For this, you can add one tracking domain per audience.


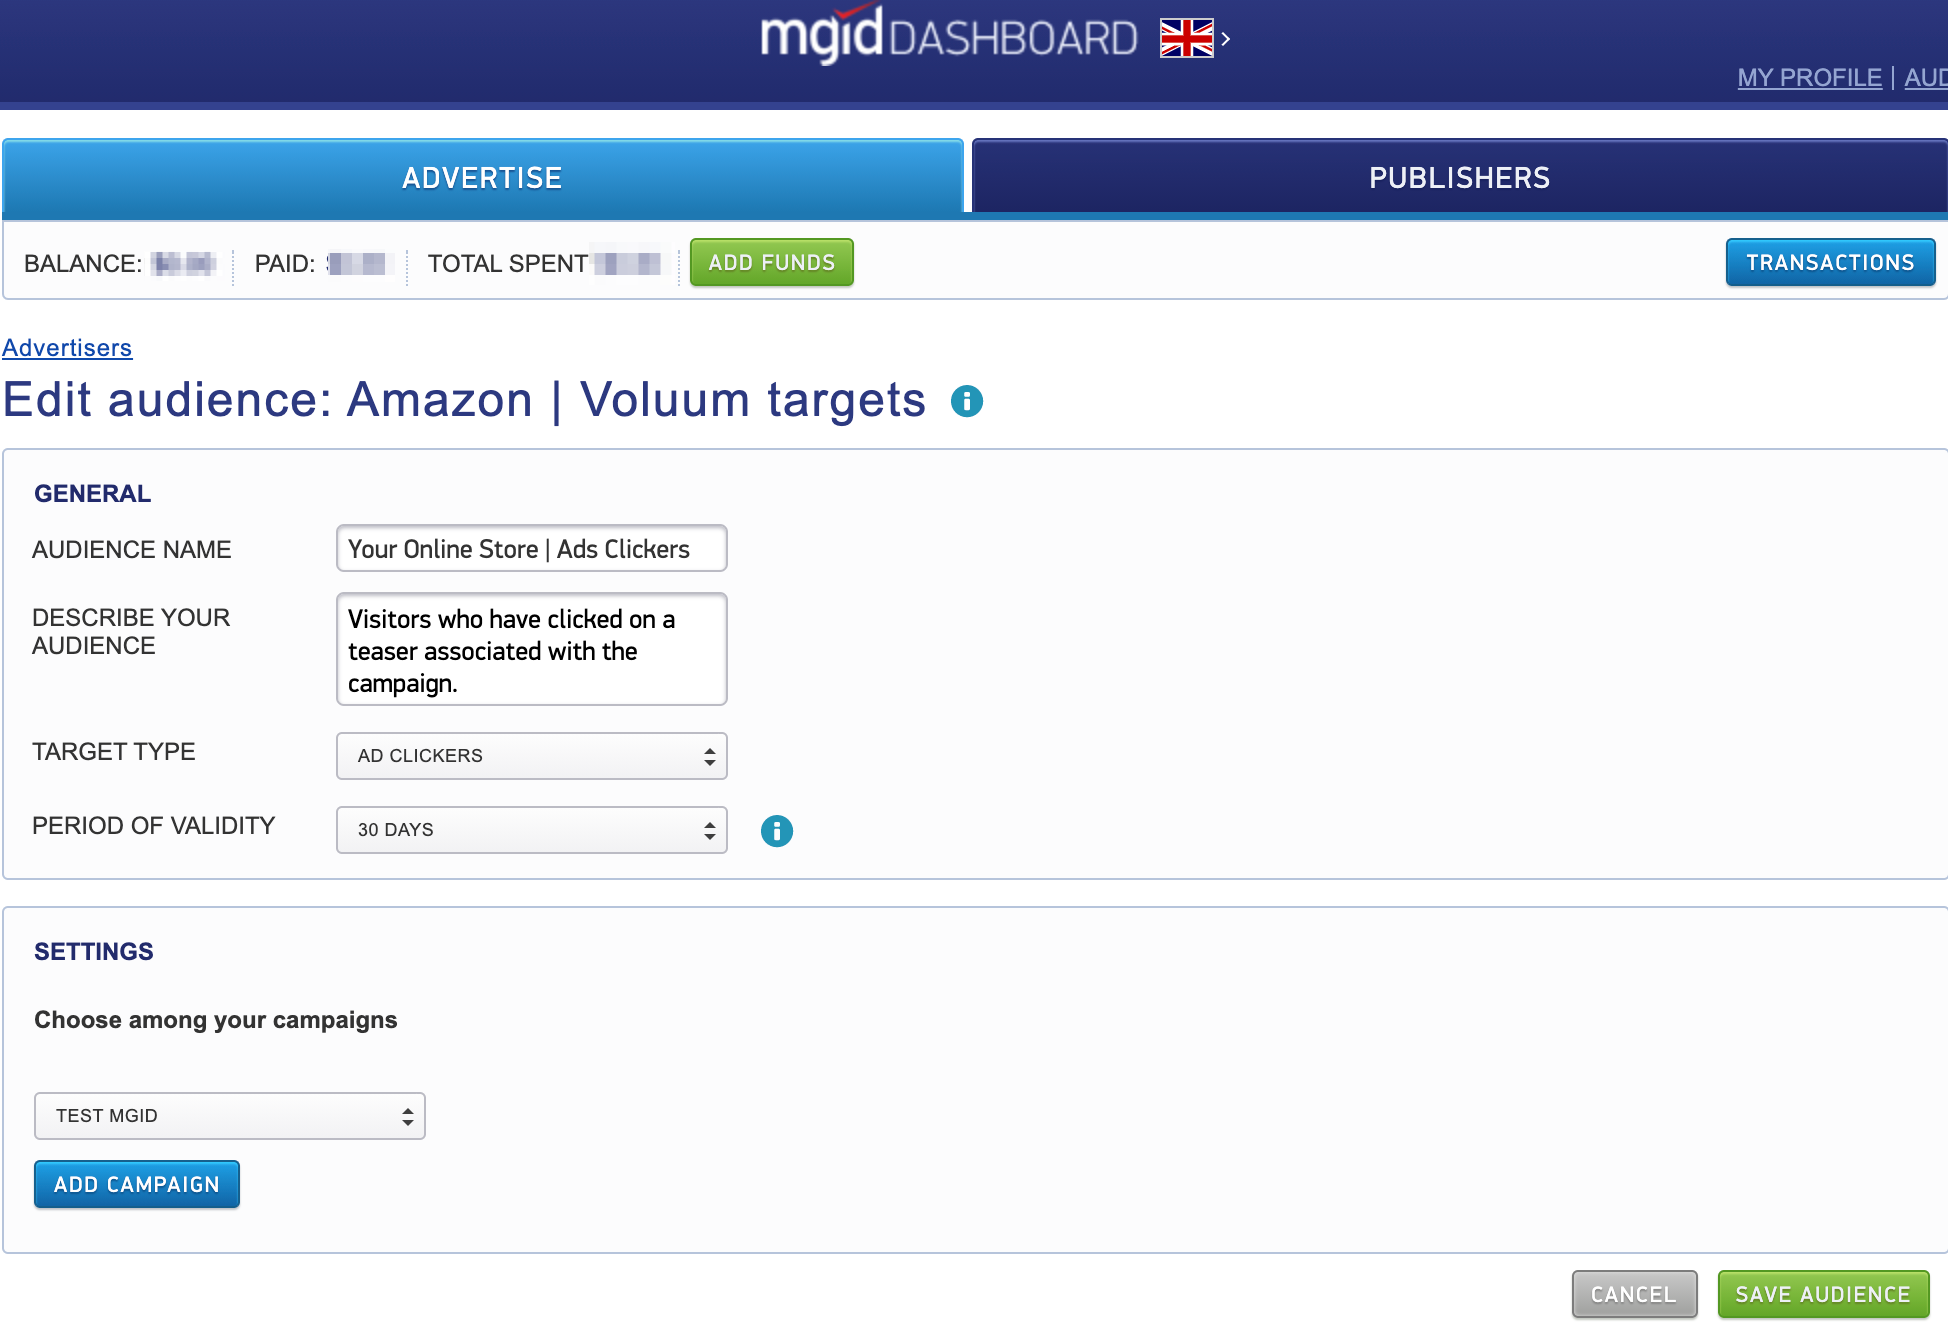
4. Target type = Ad Clickers
If you choose the Target type = Ad Clickers you can create an audience from website visitors who have clicked on an ad associated with any of the campaigns chosen.
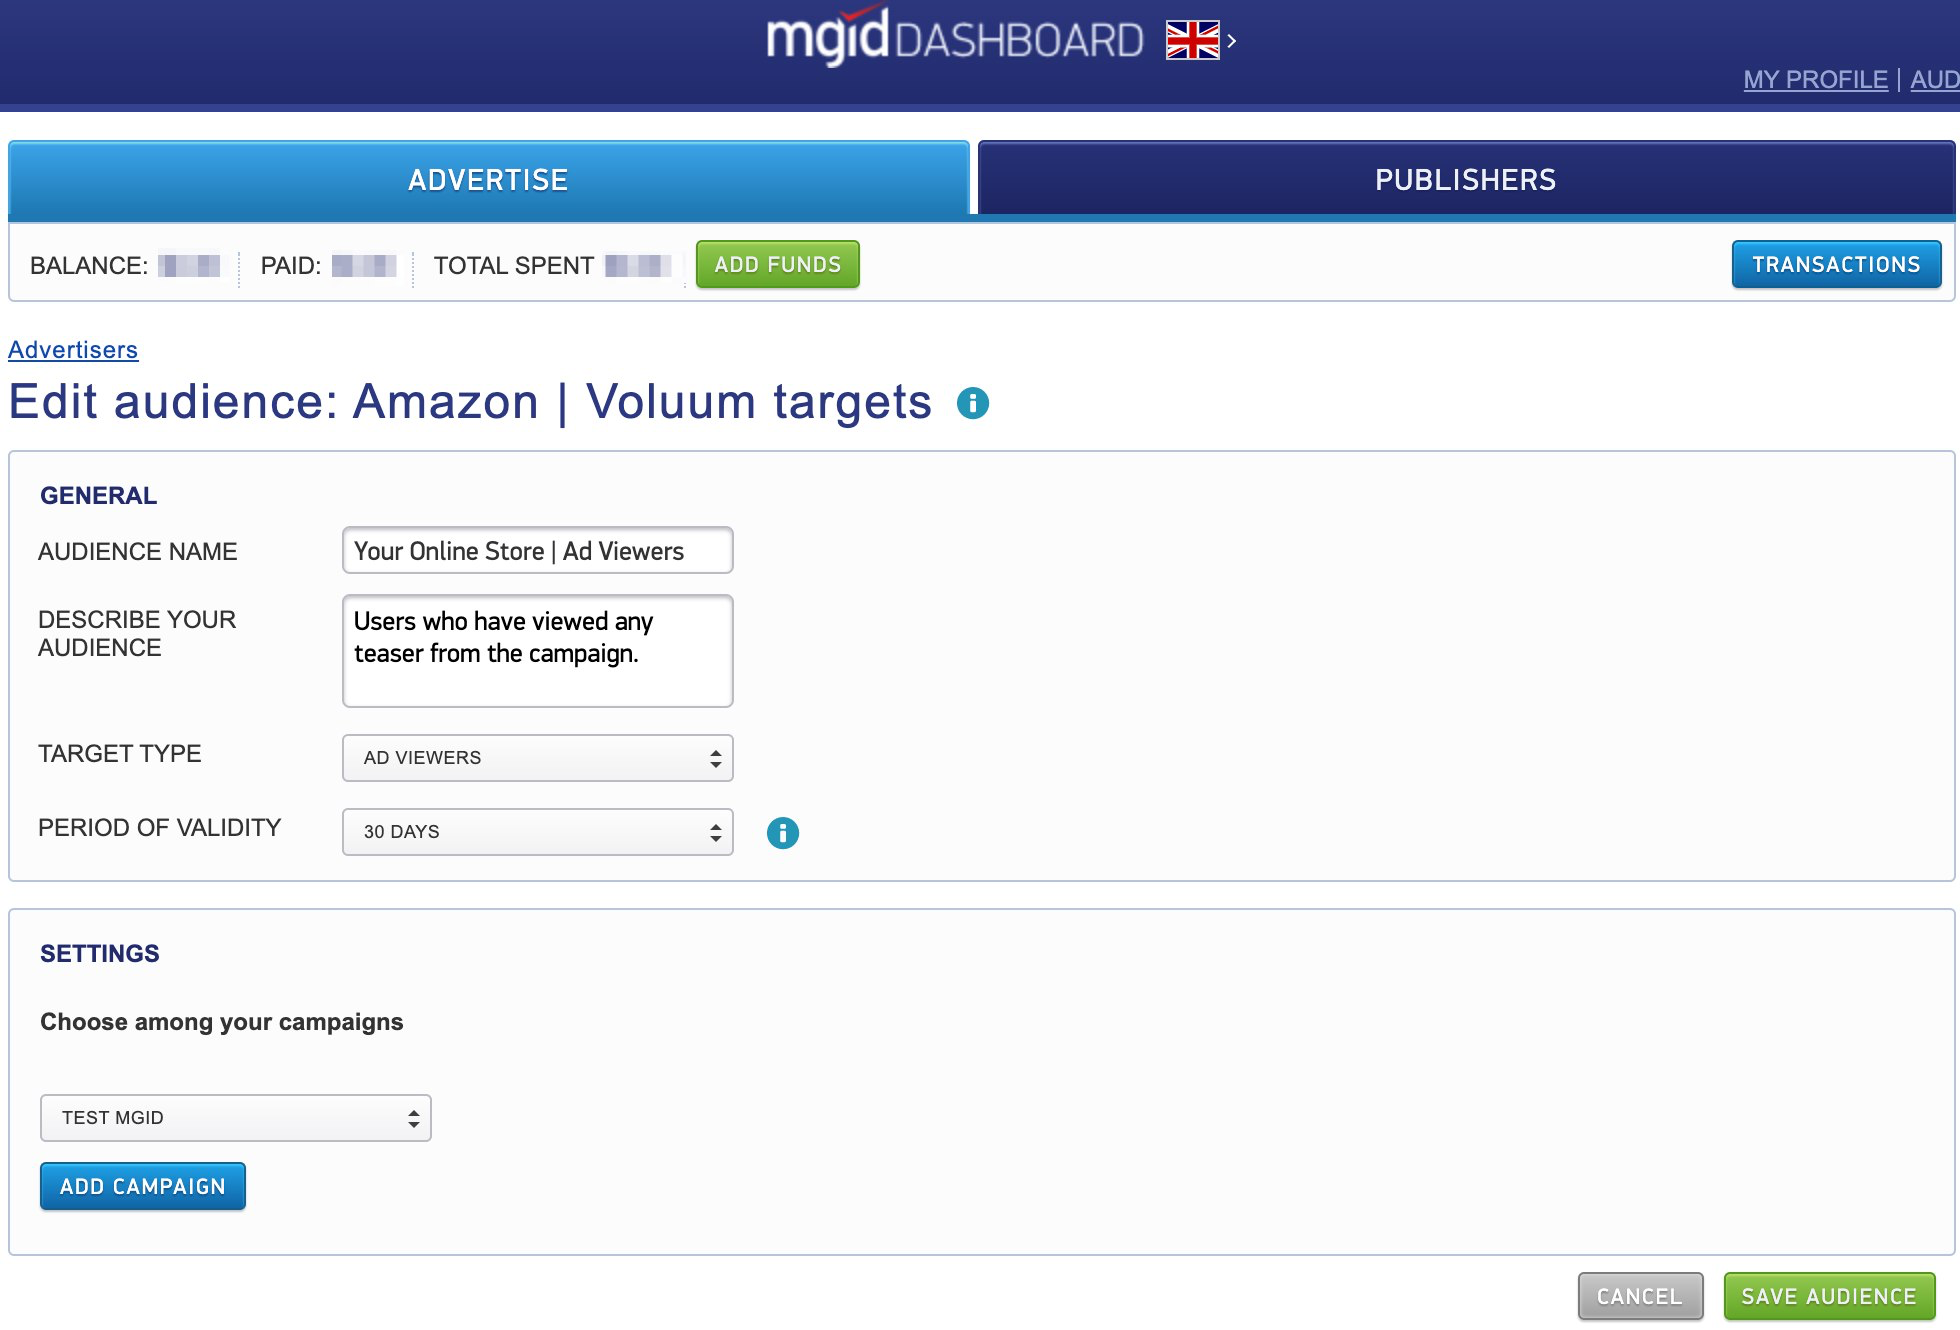
 5. Target type = Ad Viewers
When choosing the Ad Viewers target type, you can create a retargeting campaign for users who have viewed any ad from at least one of the campaigns selected from the list.
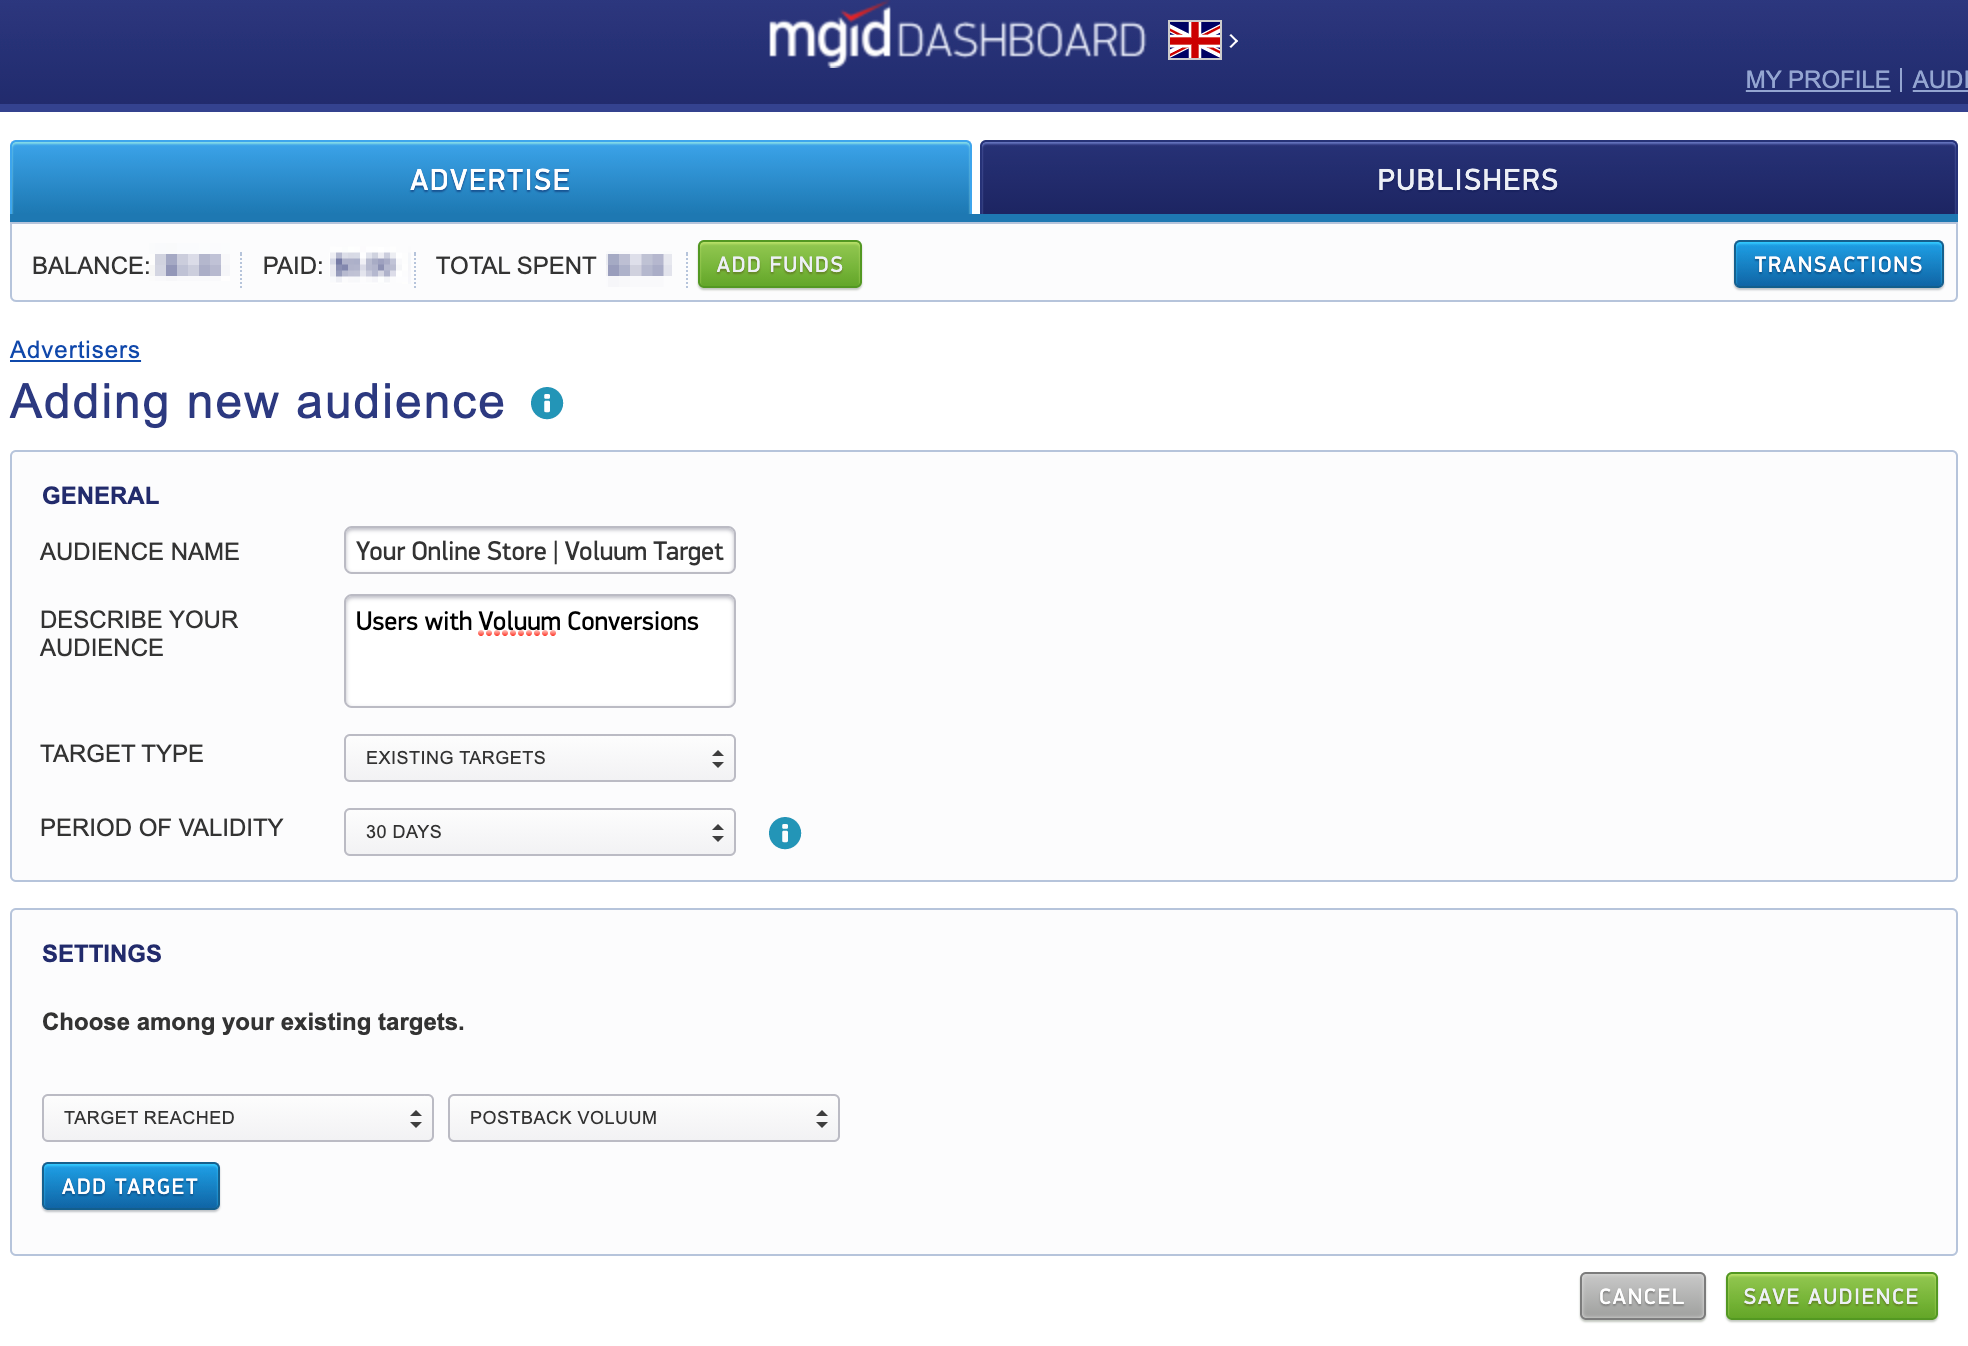
6. Target type = Existing goals
When selecting the Target Type = Existing Goals, there is an opportunity to create an audience from users who have made conversions configured for existing advertising campaigns (Fig. 9). It is possible to add a condition under which a user is added to the audience provided that he hasn’t reached the goal. There is no limit on the number of conditions.

7. Audience management
You can access the list of audiences by following the link in the Header (see Fig. 10). The Audience section is available at https://dashboard.mgid.com/advertisers/audiences
In the list of audiences, you can delete or edit the audience. When editing an audience, you can reset the conditions of adding a user to it and change the name and description of the audience.
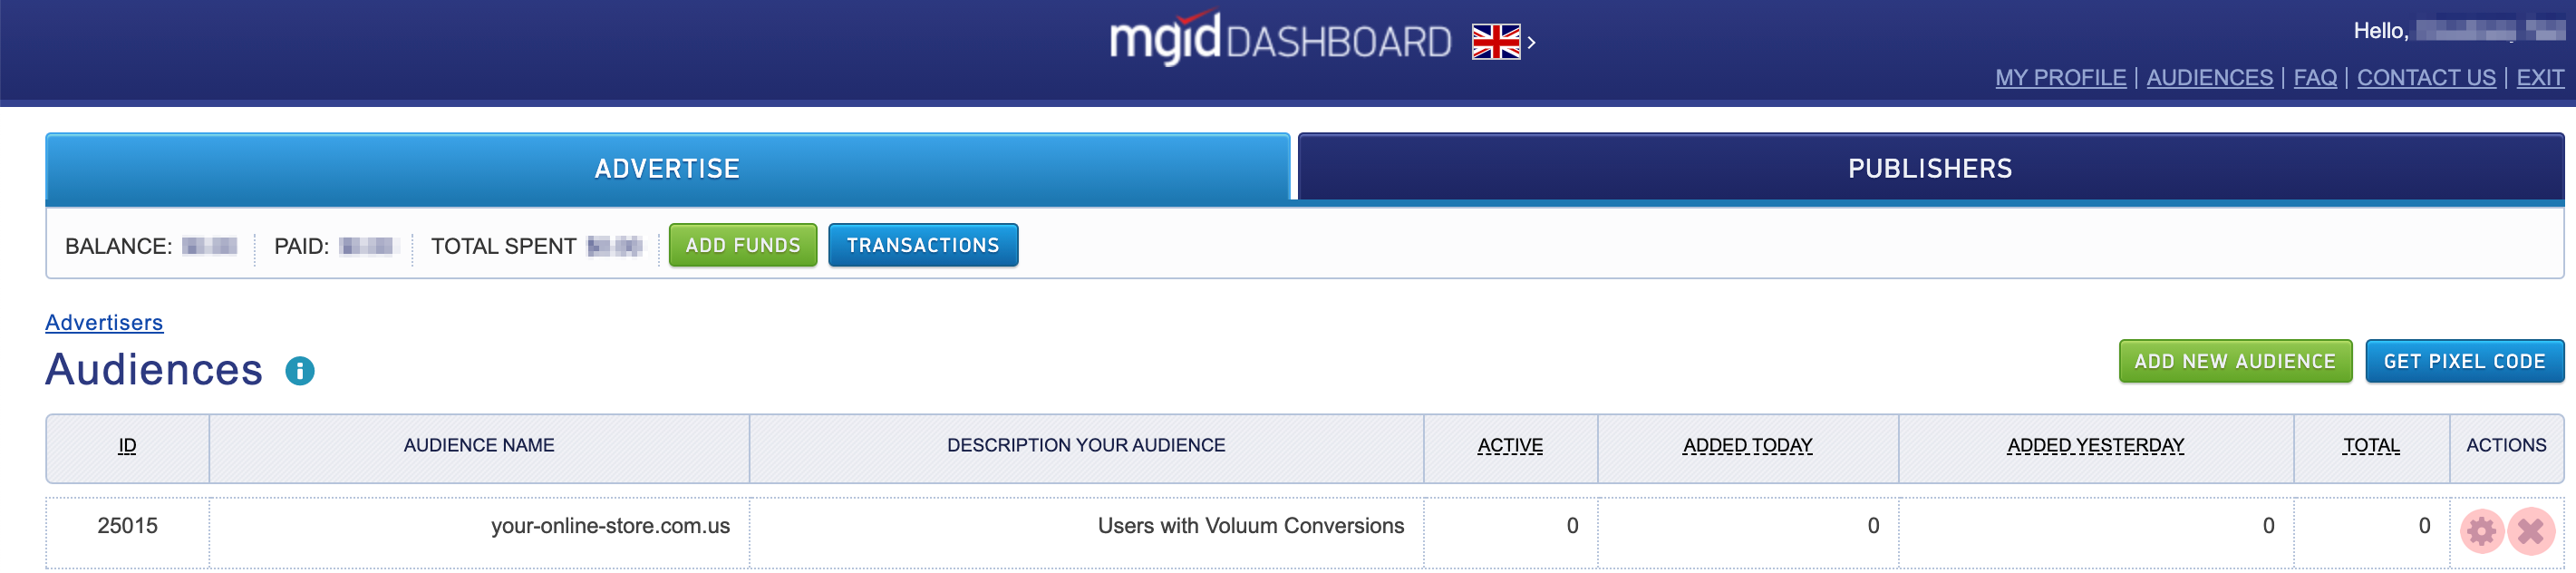
Audience Management Page
The following information about the audience is available on this page as well:
- Audience name and description
- The current number of users in the audience
- The total number of users who have been added to the audience since it has been created
- The number of users added to the audience for the present and previous day.
7. How to use the audience when creating or editing a campaign?
When creating or editing a campaign, you can add an Audience during the targeting setup. Then, the creatives of this advertising campaign will be displayed to this audience.
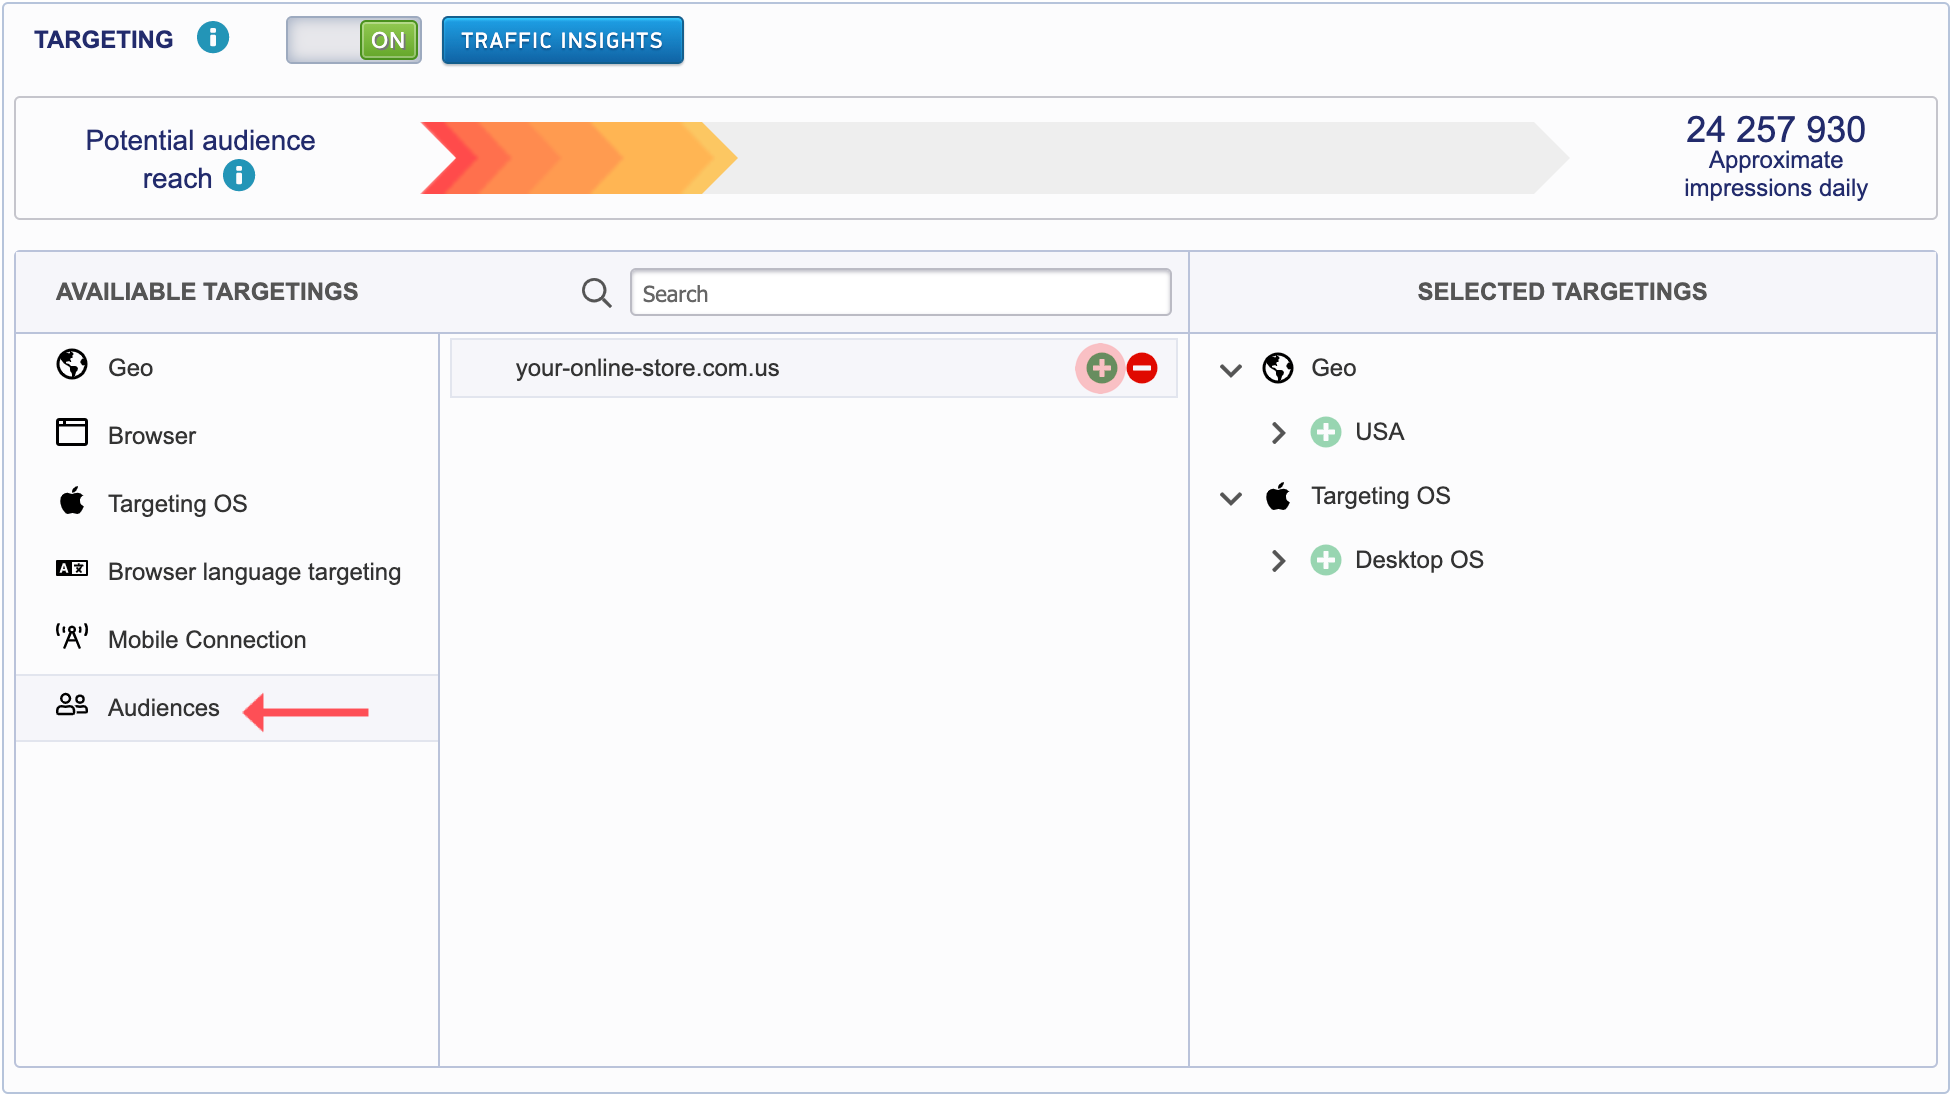
Adding the Audience to the Campaign Targeting
8. Conclusion
The MGID platform provides functionality for creating and managing audiences. This functionality allows you to target the audience more effectively in order to boost the efficiency of your ads’ display. If you have any questions about the functionality or face some difficulties during its usage, feel free to contact the Support Team.