Postback setting algorithm MGID and Kochava
- Log into the MGID dashboard and click on the “add new campaign” button

2. After the campaign was created go to the conversion sensors - MGID CONVERSION SENSOR.
We can add one step, or several, depending on at which stage you need to receive the tracking data. (Works for product offers only).
We will use the “action - install” step as an example.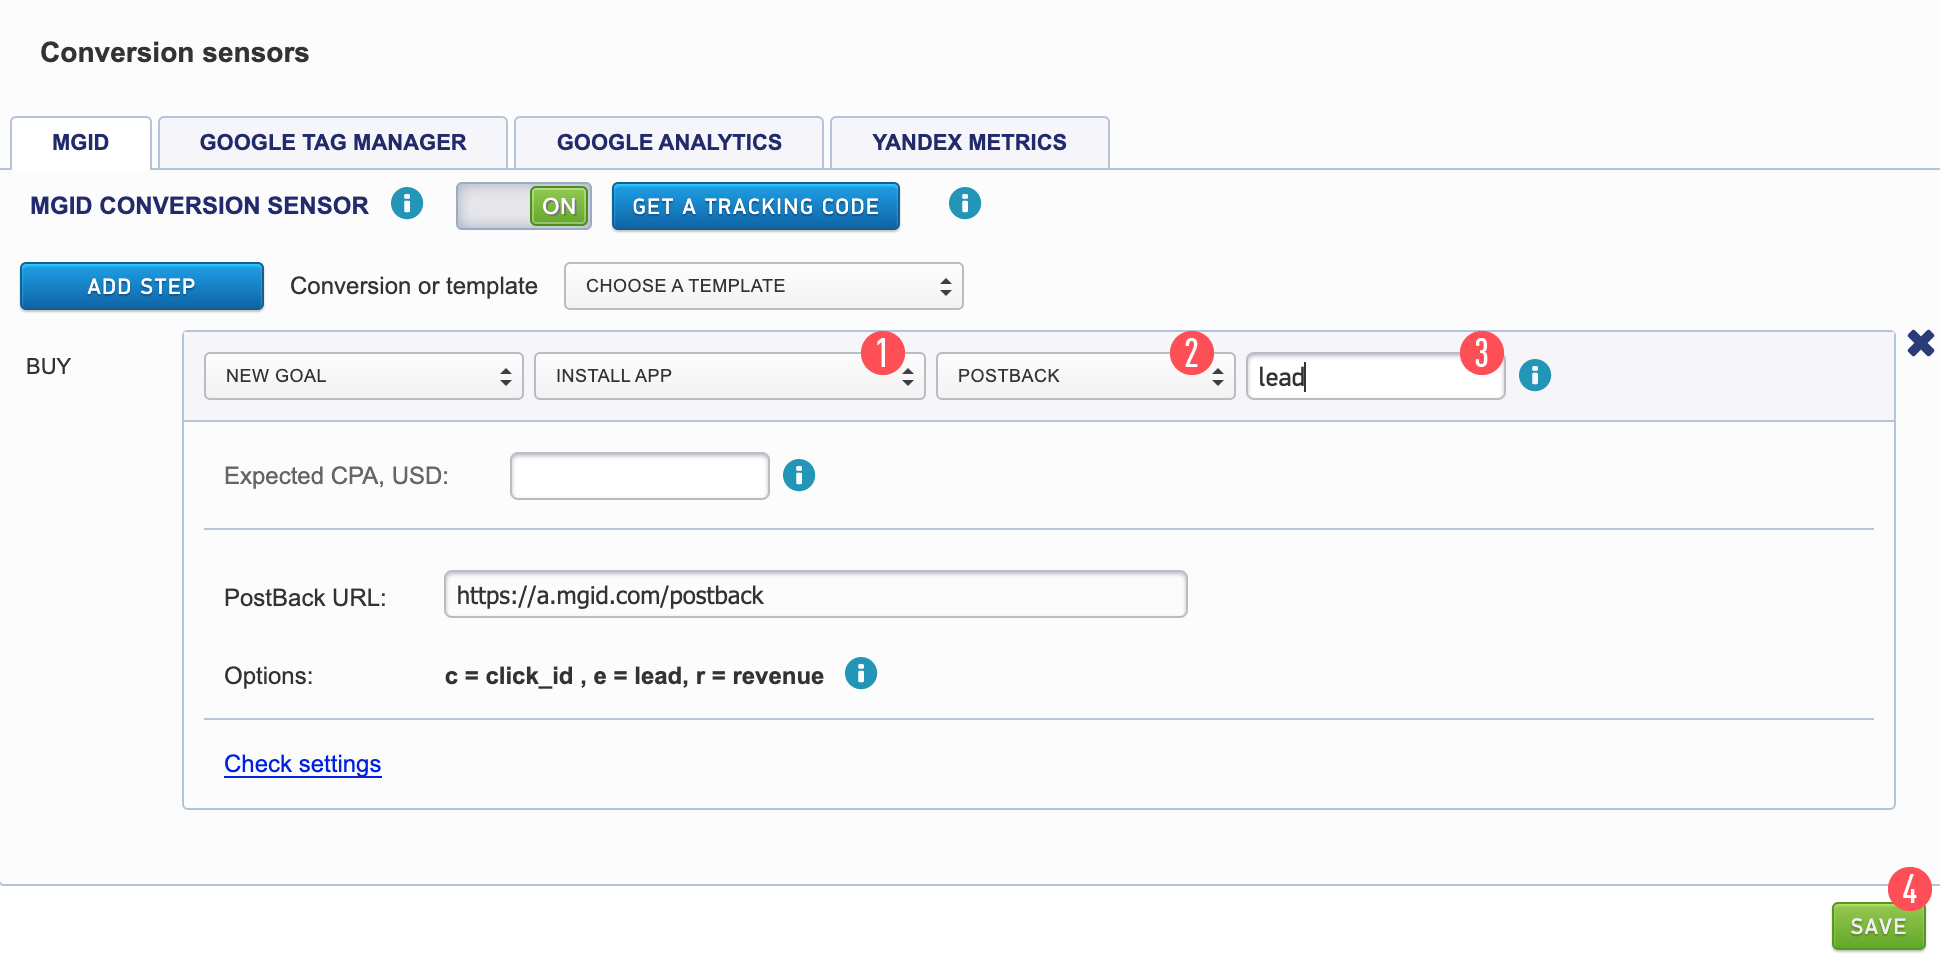 We need to do the following actions step-by-step:
- Select Install APP on Conversion Category [1].
- Select the Postback tab [2].
- Fill in the name of the event (the desired action that the user must perform on the pre-landing or the landing page, for example: press the “order a product” button or “register”). The name can be any combination of A-Z letters and numbers. IMPORTANT For Kochava system for install you have to use “kochavainstall” [3].
- Check if the link has the following parameters: [5].
"c =" - is the click parameter that should return to us in the sub form.
"e =" - an event with a unique campaign number.
"r =" - the amount of revenue, the size of the payout.
It’s not necessary to set MGID postback link into Kochava interface. System will generate it automatically
Install Postback: http://a.mgid.com/postback?c={click_id}&e=kochavainstall .
If you want to set further In-app event, you can set additional action in MGID dashboard (add step button):
In-app event: http://a.mgid.com/postback?c={click_id}&e={event_name}&r={event_value} .
The value in the “e” parameter for post install events will be whatever the client named the event. If the client has named the event Checkout Start, you’ll receive Checkout%20Start. BUT the name can be any combination of A-Z letters and numbers, so be careful.
If client need information how to connect his app with our network& create his first campaign, here is link - https://support.kochava.com/campaign-management/create-an-install-campaign/ .