1. Log in to the MGID Dashboard and click on the “Add new campaign” button.

2. Create your campaign. Then, go to the campaign settings and the custom UTM Tracking Tags.
/Advertisers/Leadbit/Leadbit_1.png?width=624&height=345&name=Leadbit_1.png)
UTM tracking tag registers the parameter/macros and saves the changes.
sub1, 2, 3, 4, 5 = {click_id}
Important point: the sub you are registering in the MGID Dashboard must be the same as the one in the Leadbit Affiliate Network, which will create the final Postback link.
3. Go to the conversion sensors - MGID CONVERSION SENSOR.You can add one or several steps, depending on at which stage you need to receive the tracking data. (Works for product offers only)
The “Action - new order” step may be used as an example.
We need to do the following actions step-by-step:
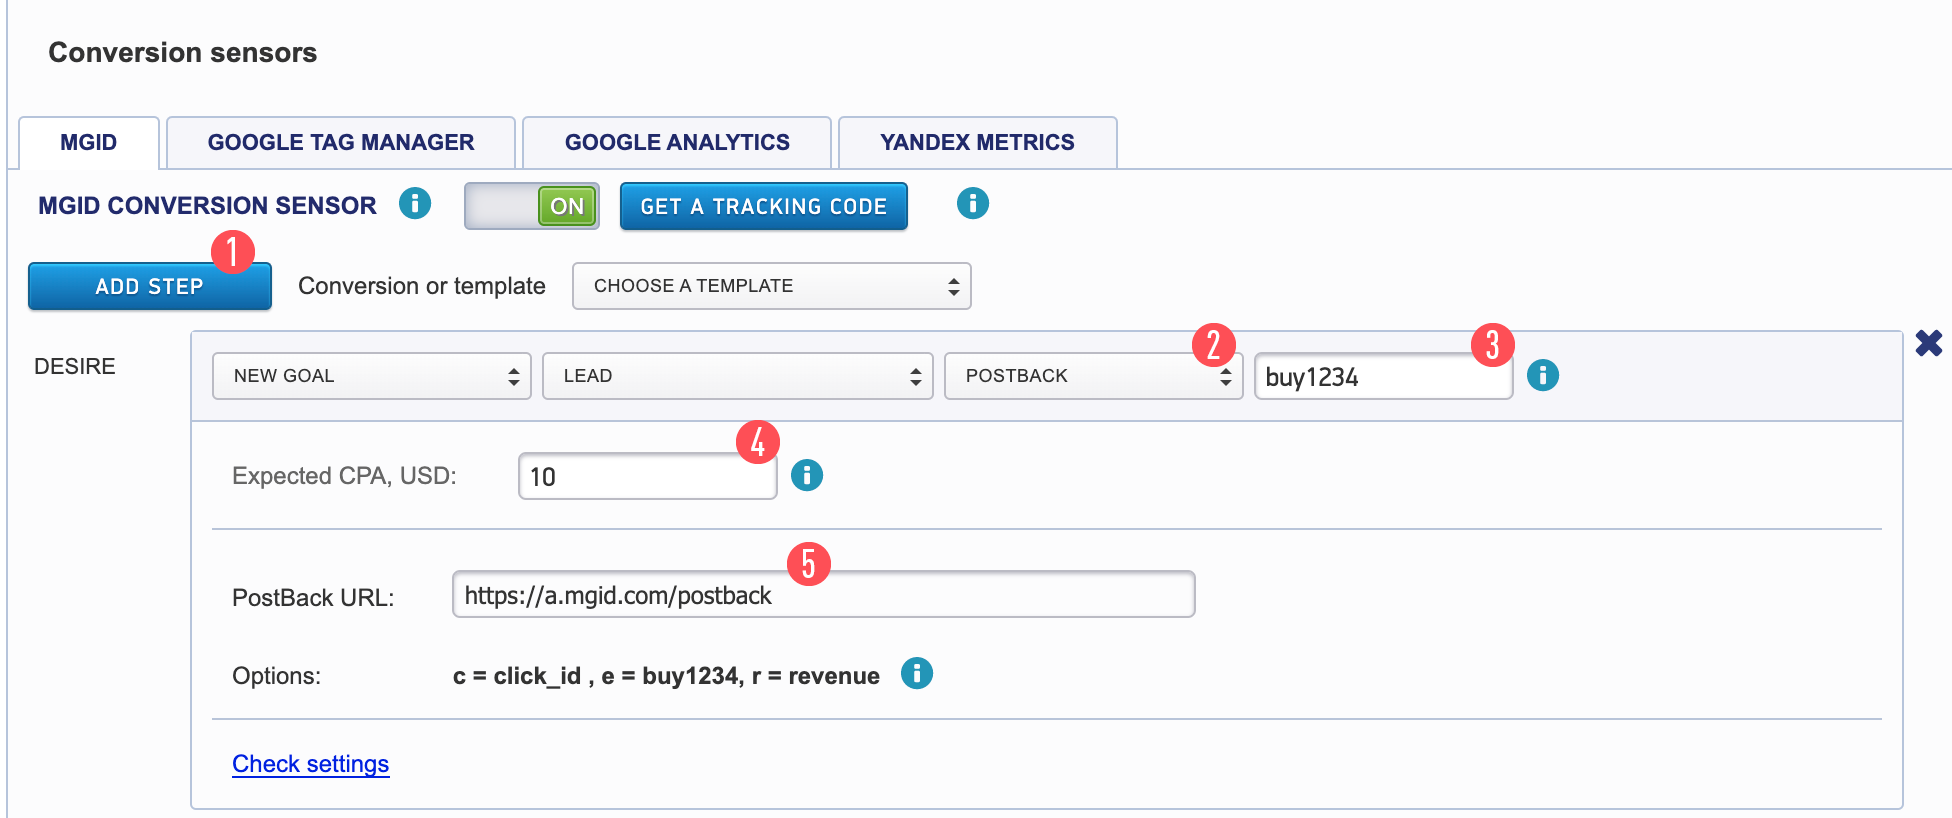
- Click on the ADD STEP button [1].
- Select the Postback tab [2].
- Fill in the event name (the desired action that the user must perform on the pre-landing or the landing page, e.g.: press the “Order a product” or “Register” button). The name can be any combination of A-Z letters and numbers. It is advisable to specify your ad campaign ID after the action name, so that the system could identify the clicks on your advertising campaign. You can find this number at the top of the page in the link, after going to the "Campaign Settings" section [3].
/Advertisers/Leadbit/Leadbit_2.png?width=624&height=130&name=Leadbit_2.png)
5. Check if the link has the following parameters: [5]
"c =": the click parameter that should return to us in the sub form.
"e =": an event with a unique campaign number.
"r =": the amount of revenue, the size of the payout.
Copy the received postback link on the MGID side and save the settings.
Here is an example of what the link should look like:
http://a.mgid.com/postback?c={sub1}&e=buy123456&r={cost}
(Substitute it with your own values. “Buy” (or another action: “Register”, etc.) is optional. Insert your campaign ID - the ID of your advertising campaign instead of 123456.
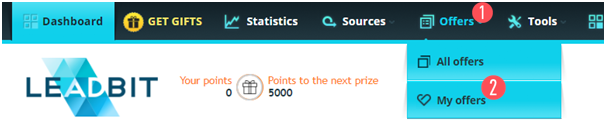
6. Then, open the website of the Leadbit Affiliate Network./Advertisers/Leadbit/Leadbit_3.png?width=624&height=299&name=Leadbit_3.png)
Go to the traffic sources in Dashboard.
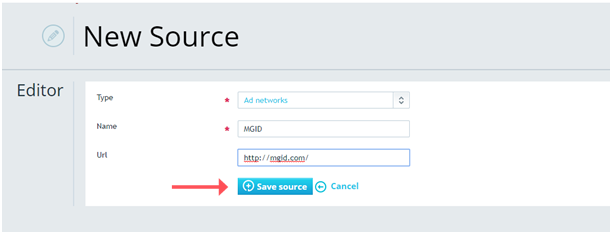
7. Click on the "Source" and “Add source” tabs. Select the type and choose the name of the source. URL is not required. Click on the “Save” button.
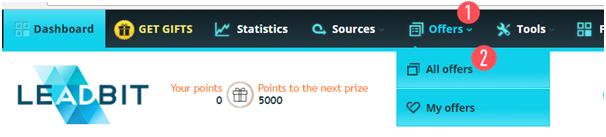
8. Go to the "All offers" section, select the desired offer, and press "Connect".
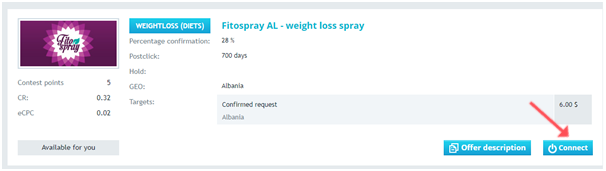
Now we need to set up the offer’s tracking link. For this, click on the “Create Tracking URL” button.
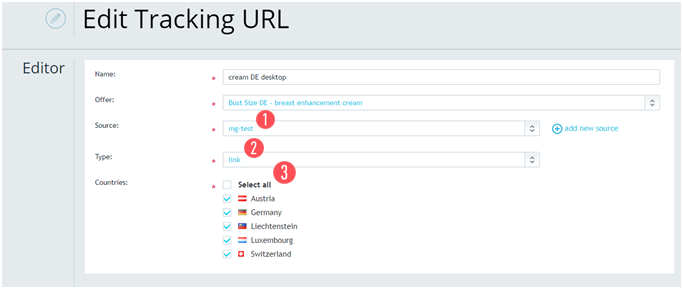
Setting up Tracking
Fill in the name (a brief description of the target, for example: “diet mobile AU for your convenience and quick orientation in the offers).
The offer is filled in automatically.
Then, select our source that was registered earlier, type (this is a link to the offer) and choose the geo(s).
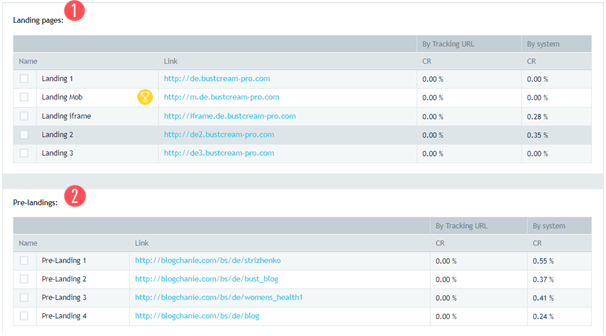
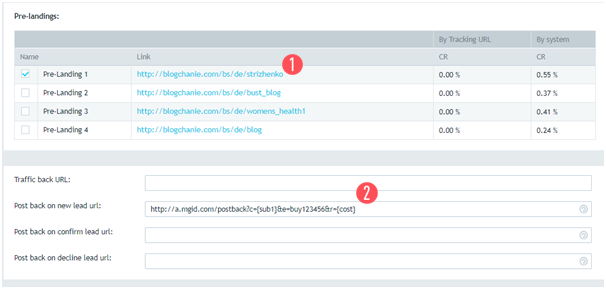
- Choose the landing and pre-landing pages.
We can select several landing and pre-landing pages for the split test (A/B test) in one advertising campaign. Still, we cannot use the iframe landing page, because they are banned in the MGID system, so please do not choose them.
Choose at which stage to send Postback and enter the link that we received earlier.
Example: http://a.mgid.com/postback?c={sub1}&e=buy123456&r={cost}
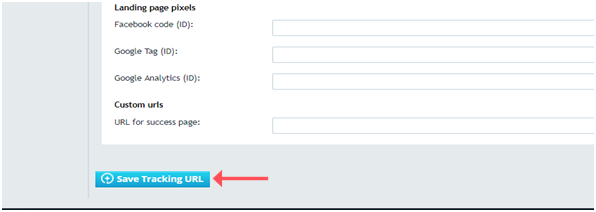
Save the settings at the bottom of the page.
Set the "e =" parameter, depending on the selected option.
The {event} name must be unique and include the campaign ID.
|
Name in the Leadbit system |
Step name in the MGID system |
How should the "e =" parameter be set on the MGID side and in the final tracking link |
Parameter description |
|
New lead |
Interest |
e = new{event} |
New order |
|
Confirm lead |
Action |
e = confirm{event} |
Confirmed order |
|
Decline |
Desire |
e = decline{event} |
Rejected/declined order |
Insert the {status} macro from the Leadbit side in Postback.
Example of the link in MGID:
http://a.mgid.com/postback?c={sub1}&e=new{buy123456}&r={cost}
/Advertisers/Leadbit/Leadbit_4_Insert.png?width=624&height=215&name=Leadbit_4_Insert.png)
/Advertisers/Leadbit/Leadbit_4_Buy.png?width=624&height=126&name=Leadbit_4_Buy.png)
Example of the link in Leadbit:
http://a.mgid.com/postback?c={sub1}&e={status}buy123456&r={cost}
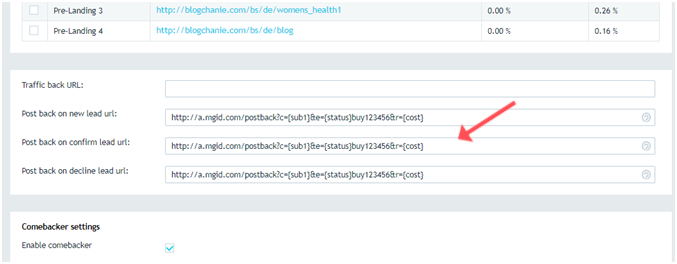
Save the changes.
- The Global Postback
Leadbit also has the option to set up a global Postback for all their members. It is the same for the total amount and for each individual offer.
Parameters in the global Postback:
- new - generation of conversions. The new order.
- confirm - confirmed order
- decline - rejected order
To do this, go to the “Tools” section, then choose the “Global PostBack” and “Edit Global PostBack” options.
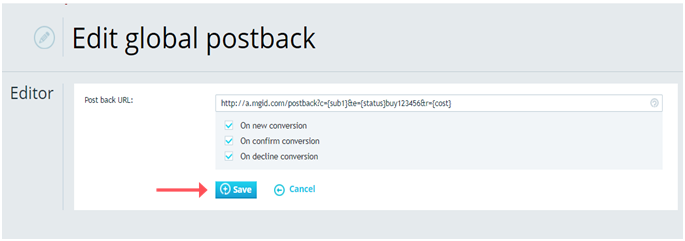
Save all changes.
Checking the Postback settings
This option was designed so that the client could immediately check whether he had set up everything correctly both on his and our side.
During the check clicks are not counted for the client, money for them is not debited, and the verification data is not included in statistics.
To check the correctness of an advertising сampaign and its integration settings, there is an opportunity to check the Postback operation.
To do this, it is necessary to switch to the "Teasers" section in Dashboard.
Follow the link indicated below the teaser:
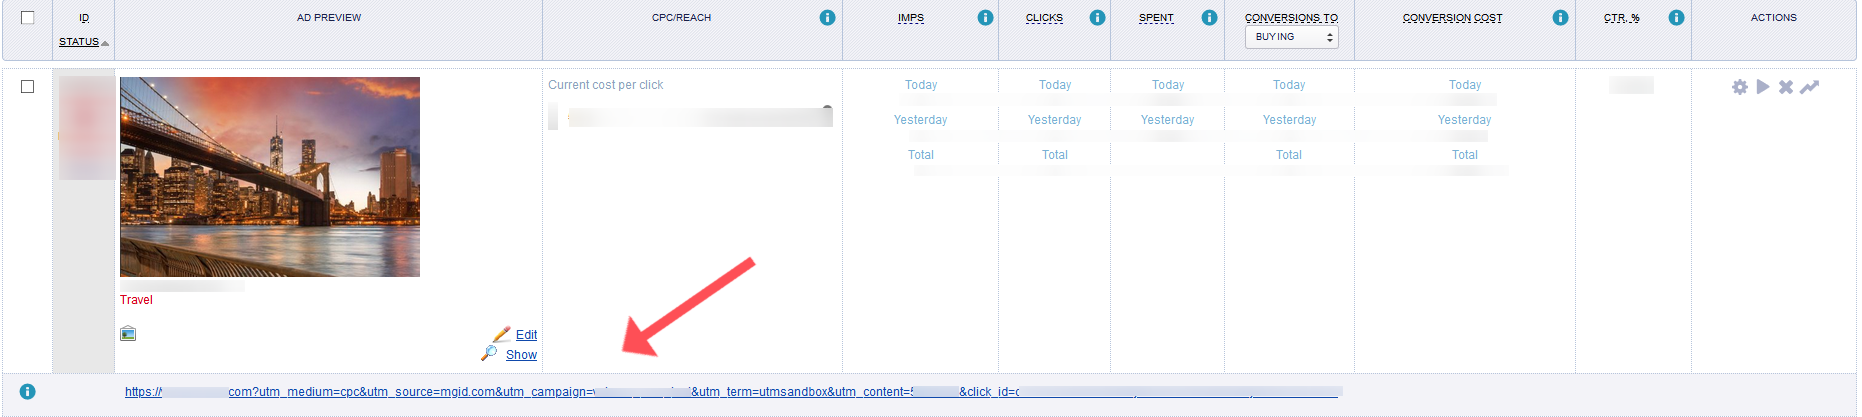
Perform the desired action (Order, Subscribe, Register, etc.).
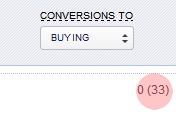
Within 15 minutes the test conversion will be displayed in total statistics of the client’s account (test conversions are displayed in brackets):
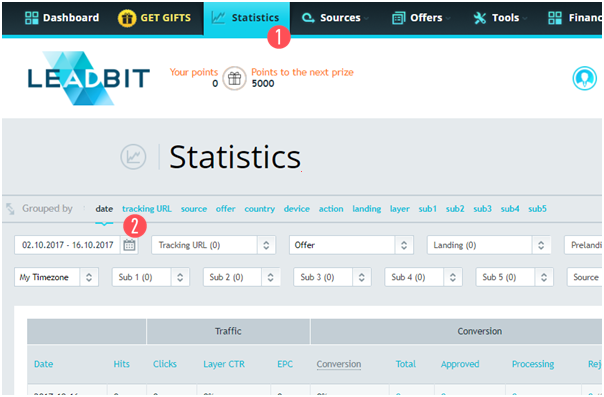
In the Leadbit system you can go to the "Statistics" section and select the required additional parameter with the specified date.