Postback Setup Algorithm
- Add an ad campaign to Dashboard.

2. Add conversion stages 1 to 3 (Interest, Desire, Action) to the Conversion Sensors section, however, if desired, an existing or a new goal (step) may be chosen.
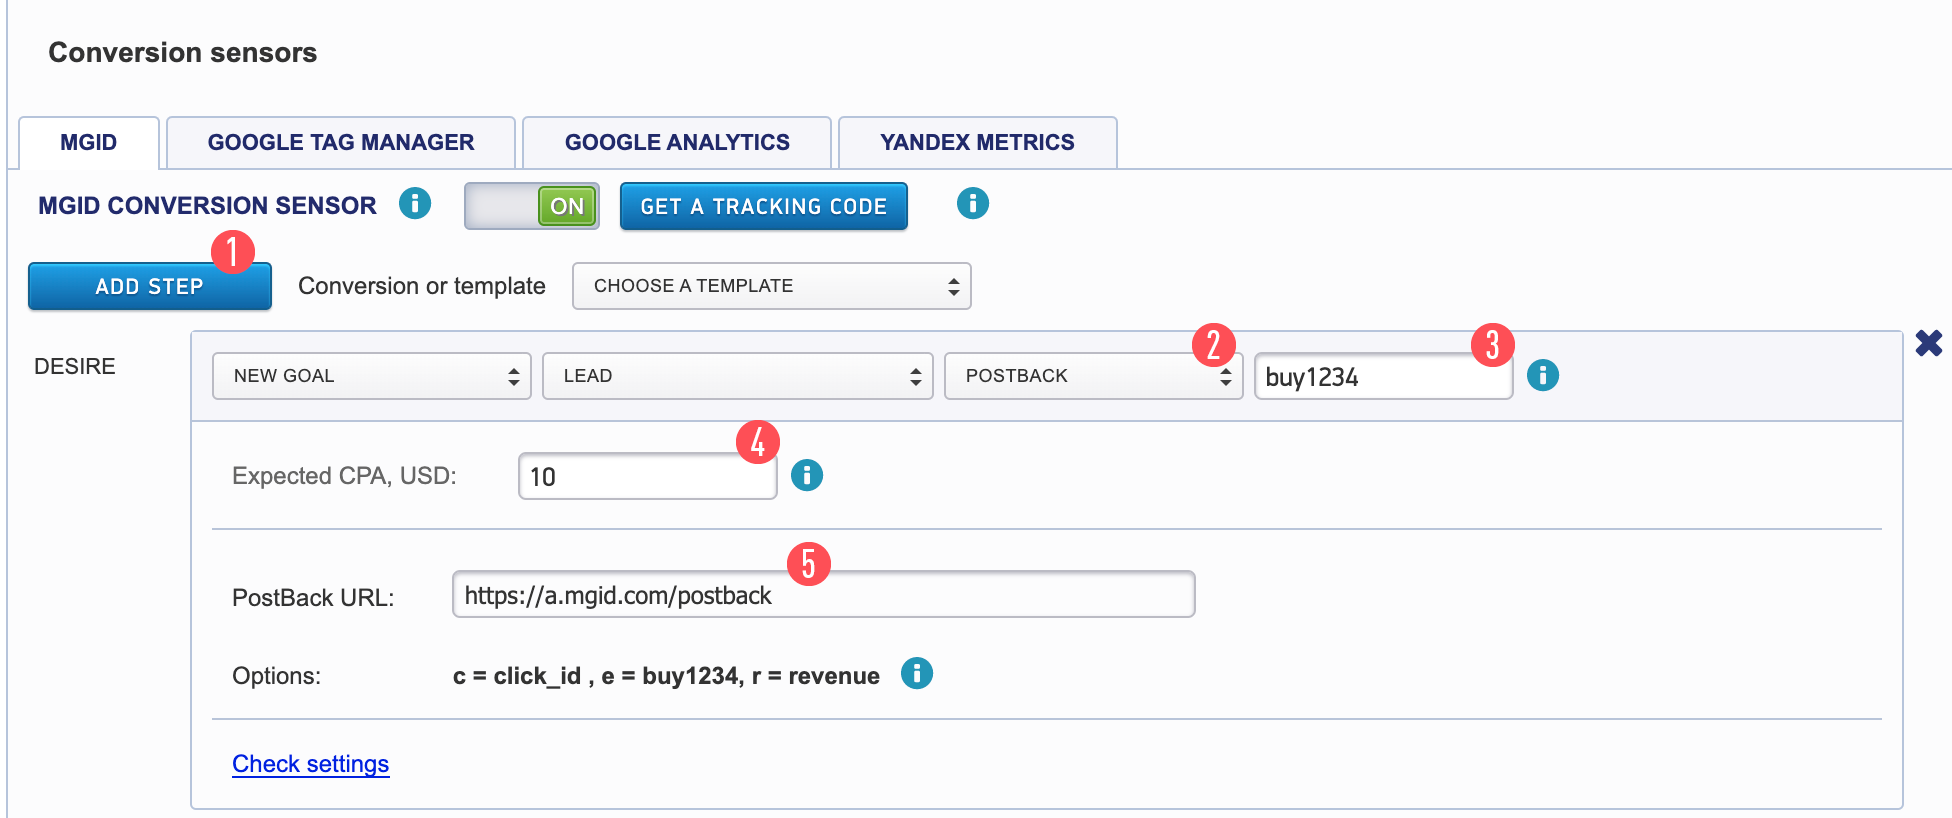
- Add a stage (goal) by clicking on the "Add Step" button [1].
- Select the Postback tab [2].
- After selecting the Postback tab, you will be prompted to use custom UTM Tracking Tags. Please ignore this prompt. There is nothing to add there.
- Fill the name of the event [3] (e.g. buy123456 is the example, the required value is taken from Indoleads here).
- The event should be named after the triggered event (pending, declined, approved, overaged).
- Optionally, fill in the conversion cost [4].
- Copy the received postback link on MGID’s side [5].
- Save the settings [6].
The Postback URL will look like the following:
- https://a.mgid.com/postback?c={p1}&e={status}123456&r={payout}
*123456 is a unique parameter for our system (e.g. campaign ID). This parameter will be transferred to our system along with the status of the event.
3. Log in to the Indoleads Dashboard.

In the Account section select Promotion Methods and tick the necessary option.
In the My websites section specify https://www.mgid.com as the Traffic Source
4. Go to the "Offers" section.
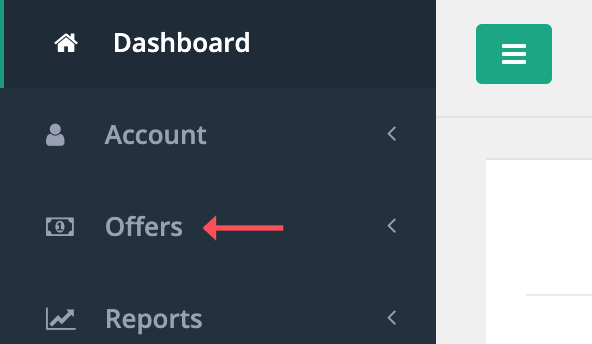
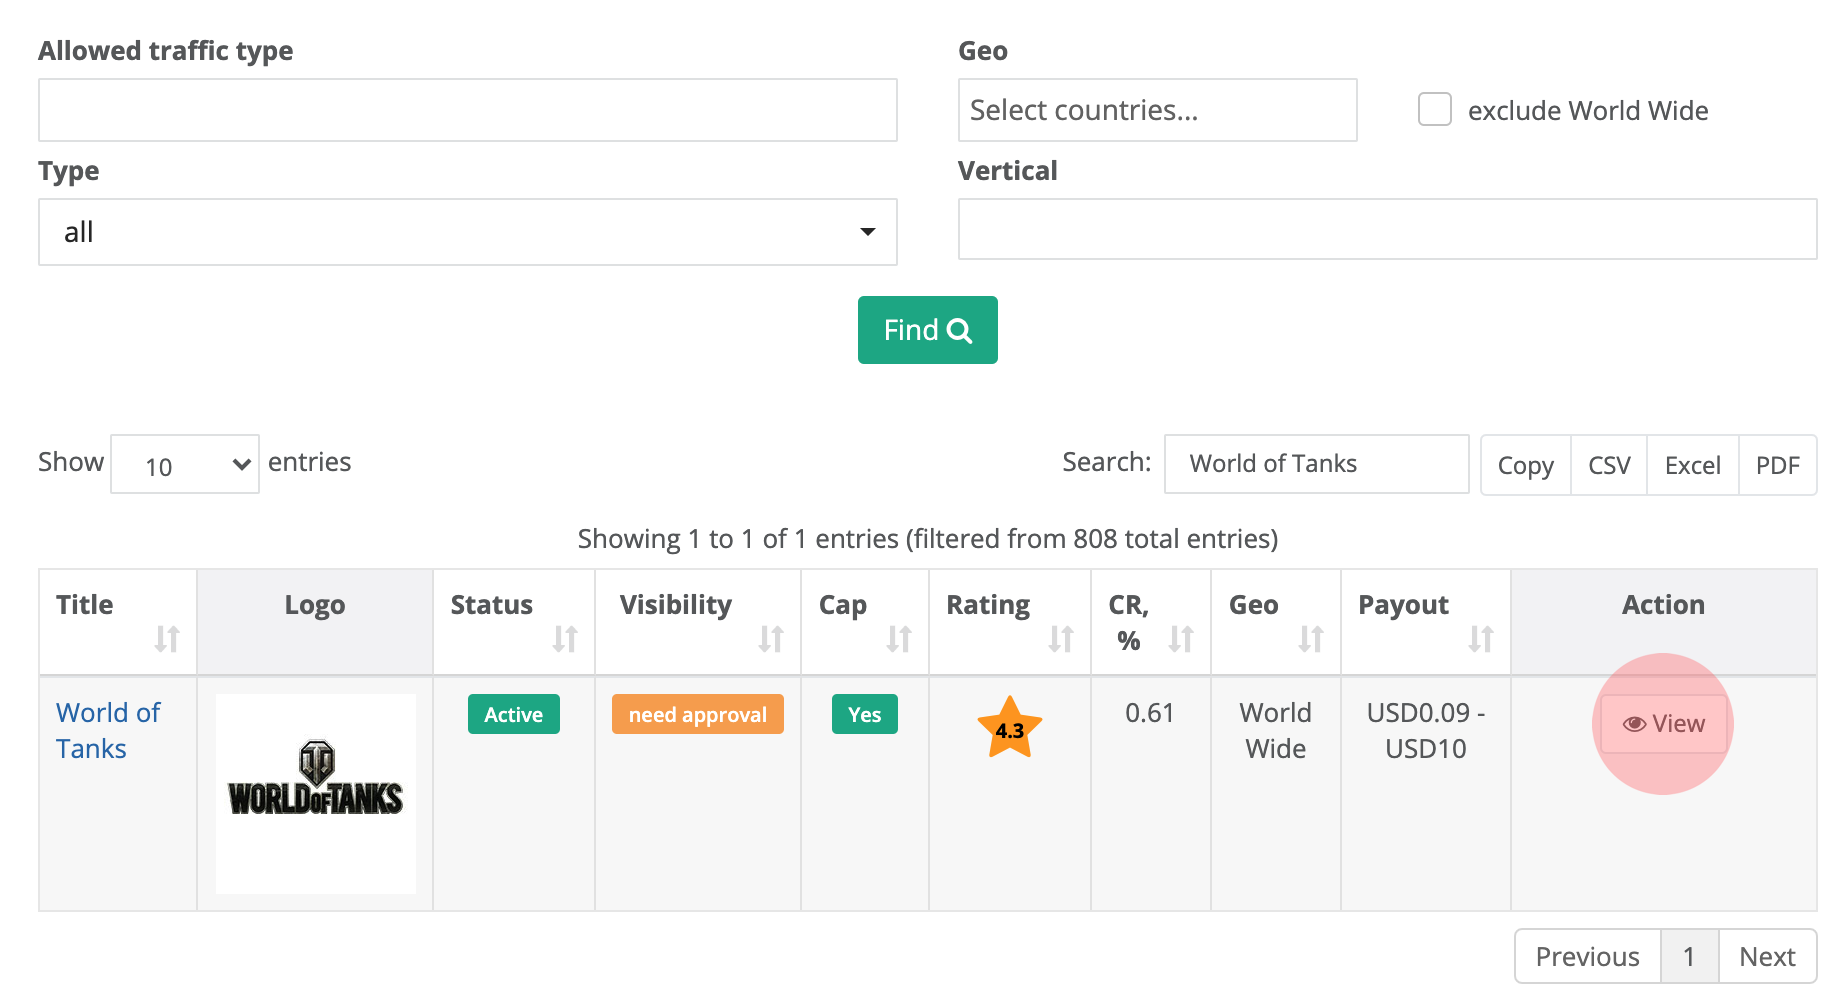
Select the required offer from the list and open it using the “View” button.

Additional parameters - > Add sub Ids:
Sub1,2,3,4
Add our macro {click_id} to Sub1 and click on the “Update” button
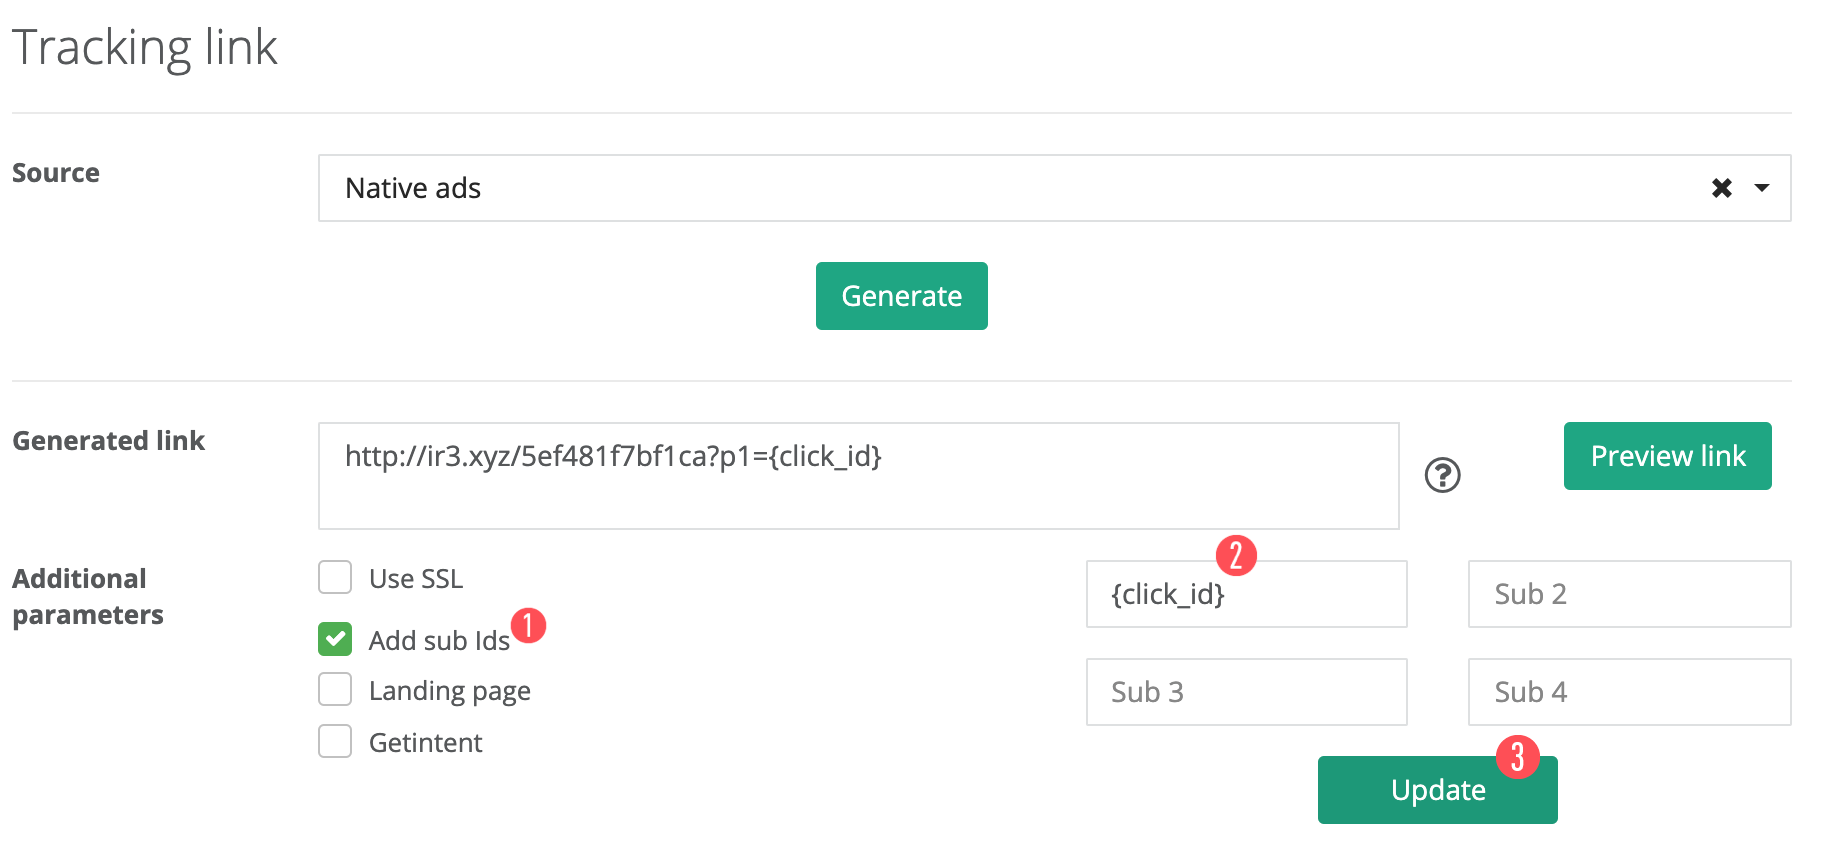
These are the parameters that will be transferred to the Indoleads Affiliate Network once a click on the teaser occurs.
The only indispensable parameter for Postback is {click_id}.
Enter it in the Sub1 field.
Choose the landing/pre-landing pages.
This will be displayed when you click on your teaser link.
For example:
- https://ir3.xyz/xxxxxxxxxx?p1={click_id}
Copy the ready-made link and insert it in the URL field in MGID
Note: it is important that the link should begin with: https: //

6. Choose the Postback section.
Click on the “Edit” button and insert the Postback URL there:
- https://a.mgid.com/postback?c={p1}&e={status}123456&r={payout}
*123456 is a unique parameter for our system (e.g. campaign ID). This parameter will be transferred to our system along with the status of the event.
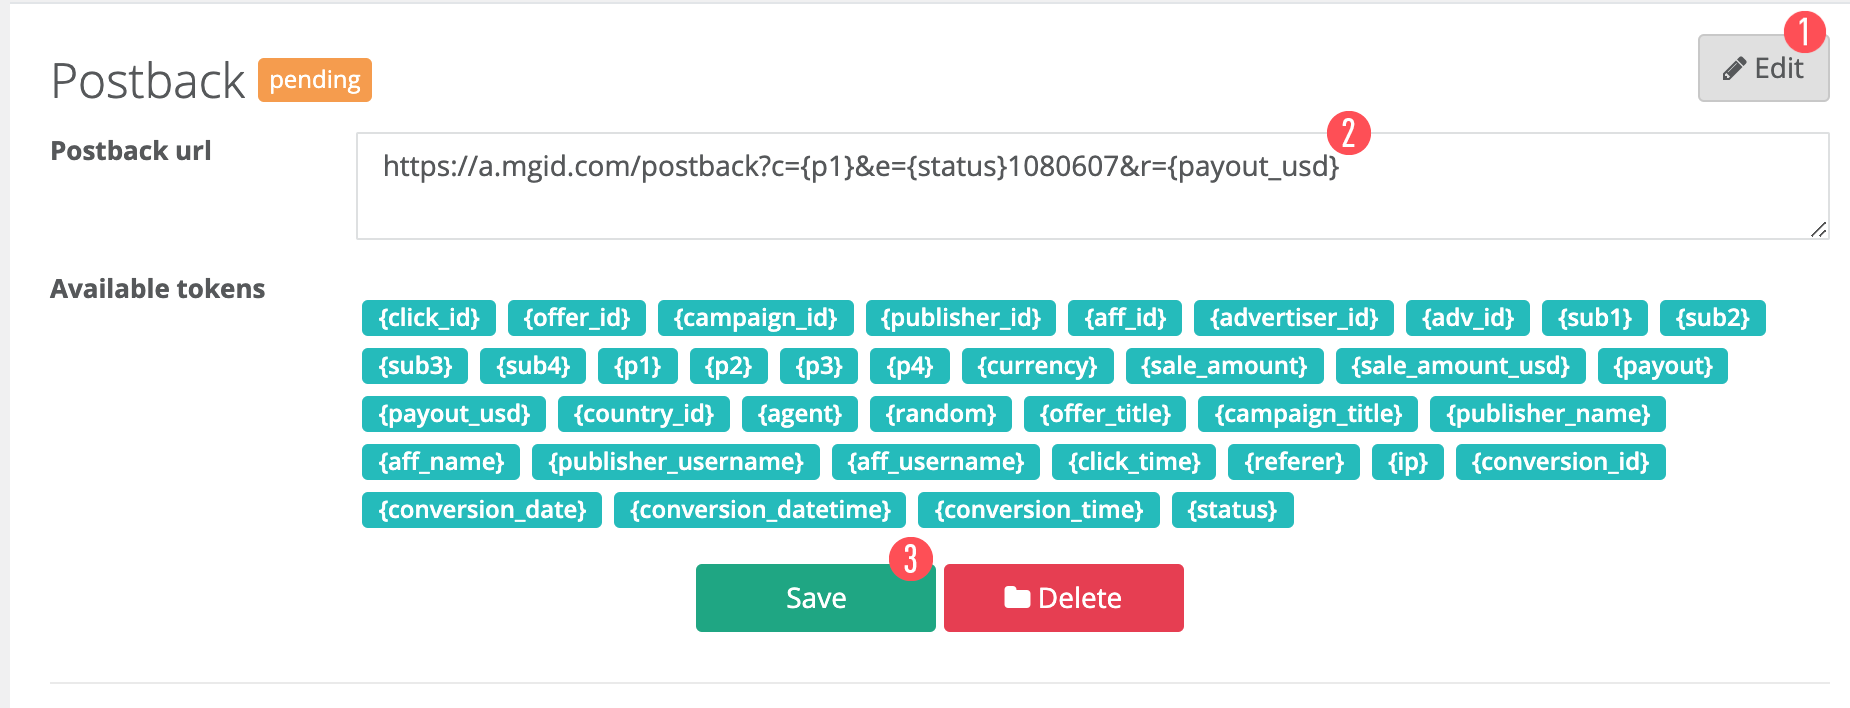
{p1} is the macro - indicated in paragraph 5 - which will transfer the сlick_id to MGID.
{status} is the order status value (pending, declined, approved, overaged).
Save the settings.
After saving, Postback is sent for approval to your manager.
Checking the Postback URL settings in the MGID Dashboard
This option has been made so that the client could immediately check whether he had set up everything correctly on both sides. During the test conversion the clicks are not counted, money for them is not debited, and the verification data is not included in statistics. There is an opportunity to check the Postback operation:
To perform this check, go to the “Ads” section in Dashboard.
In the ad campaign, follow the link below the teaser:
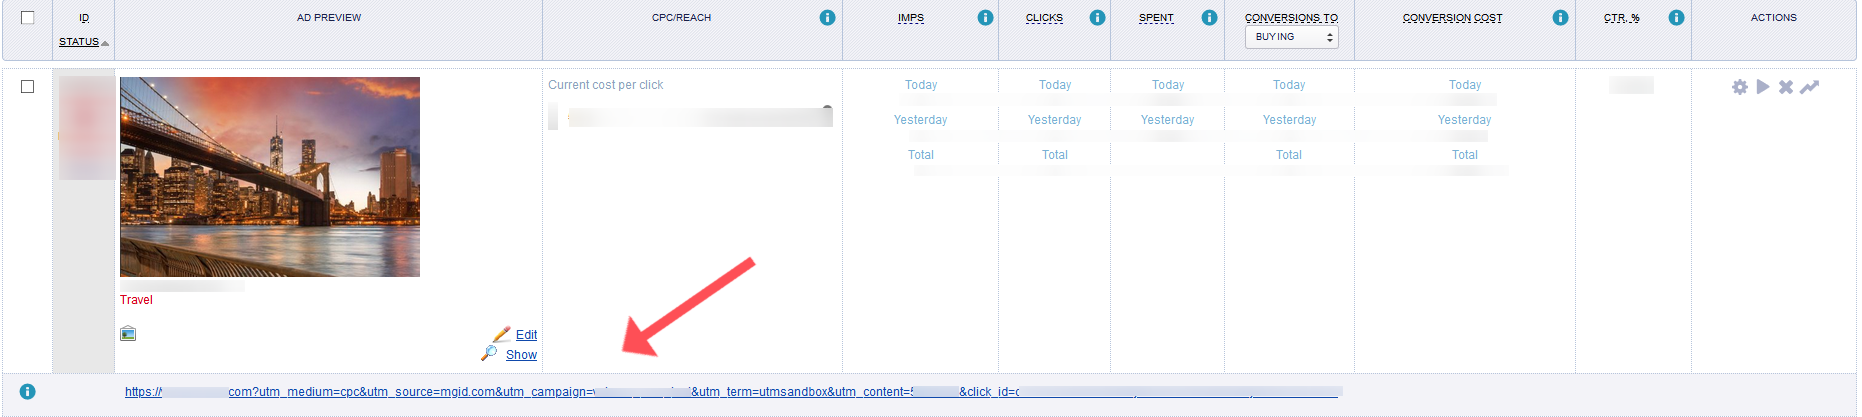
Perform the target action (Order, Subscribe, Register, etc.). For this example, it is to confirm the order (See step 5 of the guide). The test conversion will be displayed in the total statistics of the client’s account within 15 minutes, and test transactions are displayed in brackets:
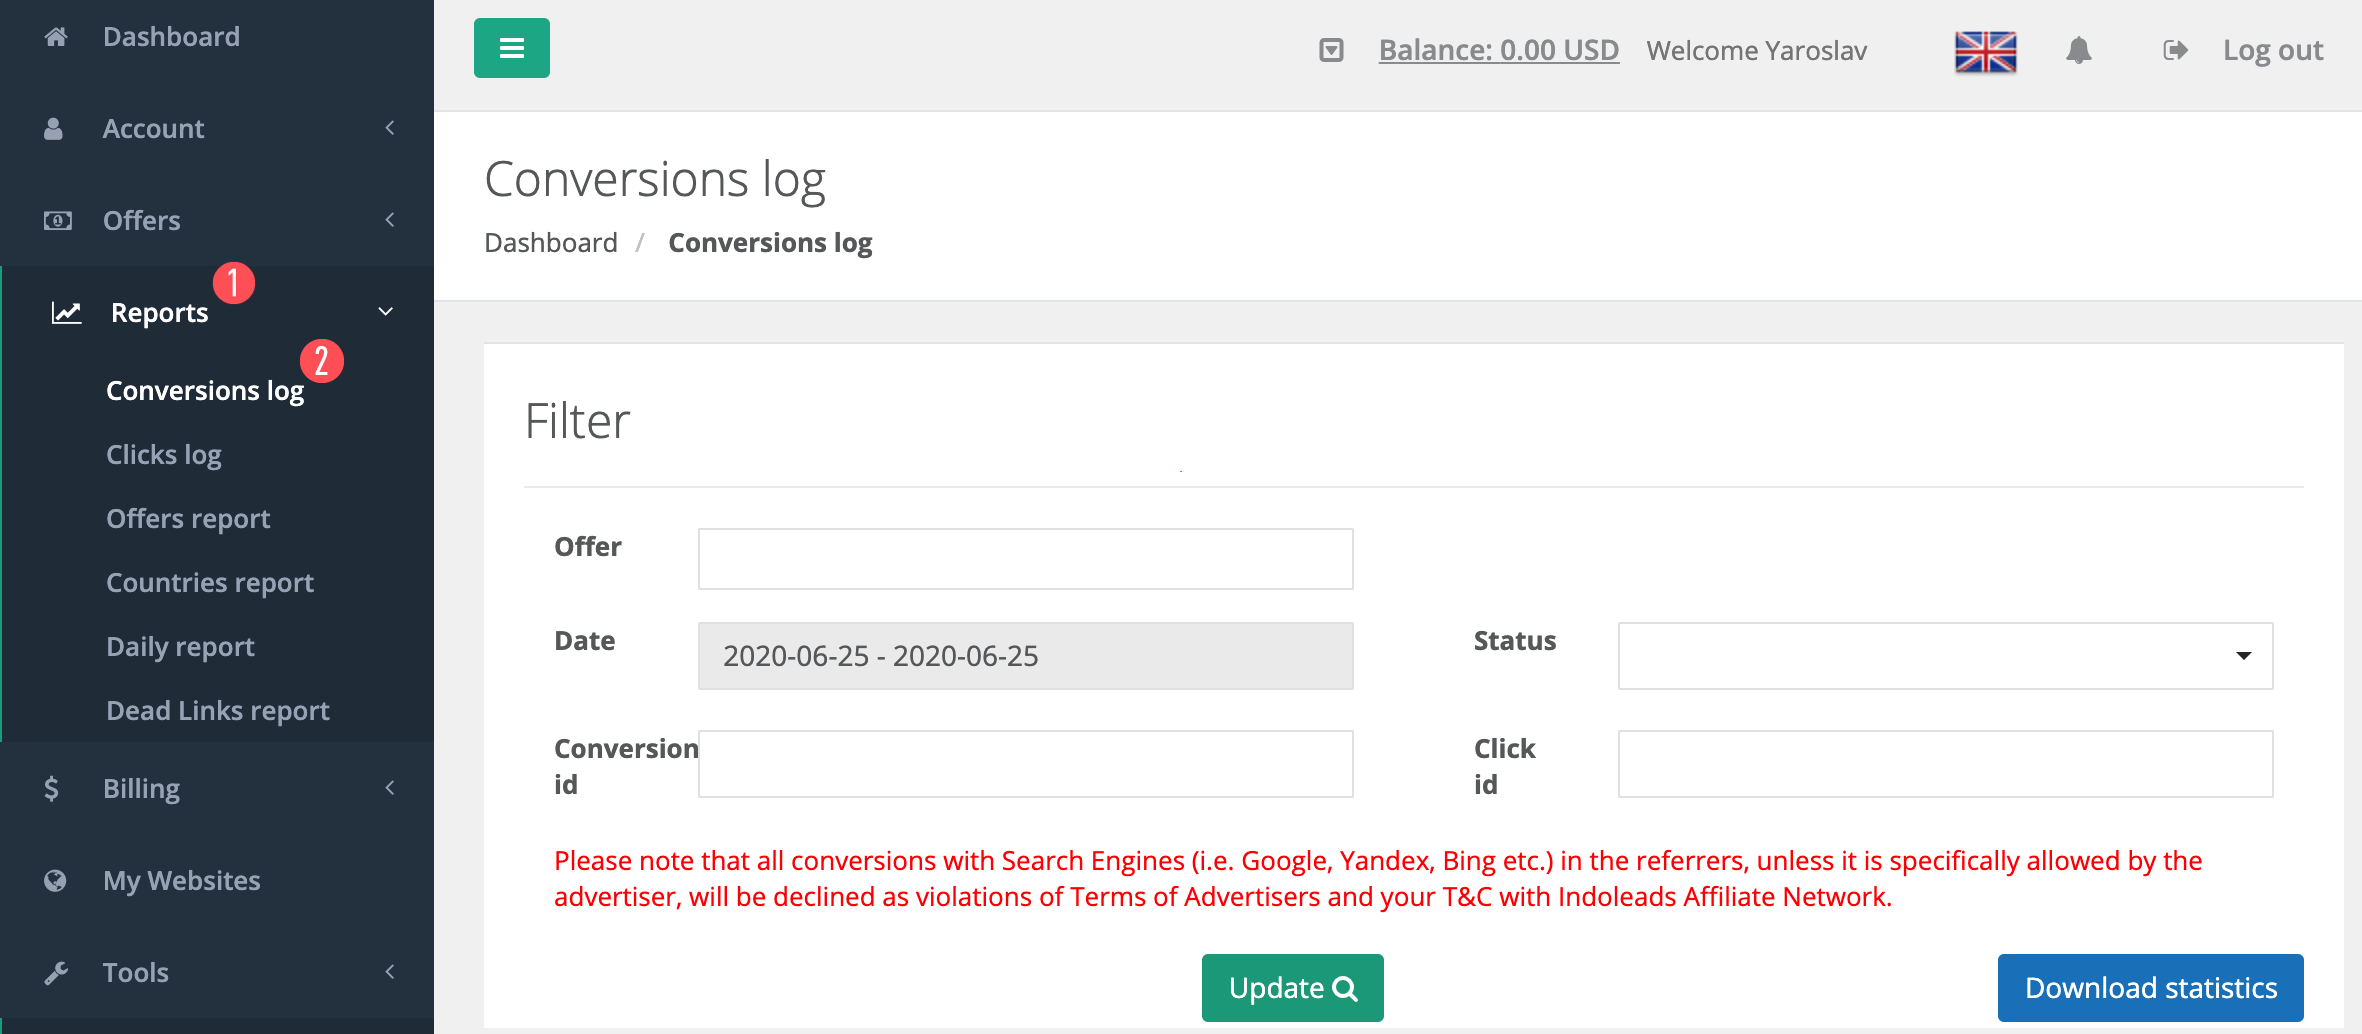
The Conversions statistics can be viewed as well by going to the Reports tab -> Conversions log. Choose the relevant time period and other required values.