Tip: The instruction below covers tracker integration. If you want to check the partner’s documentation, please follow this link here.
Set up on MGID
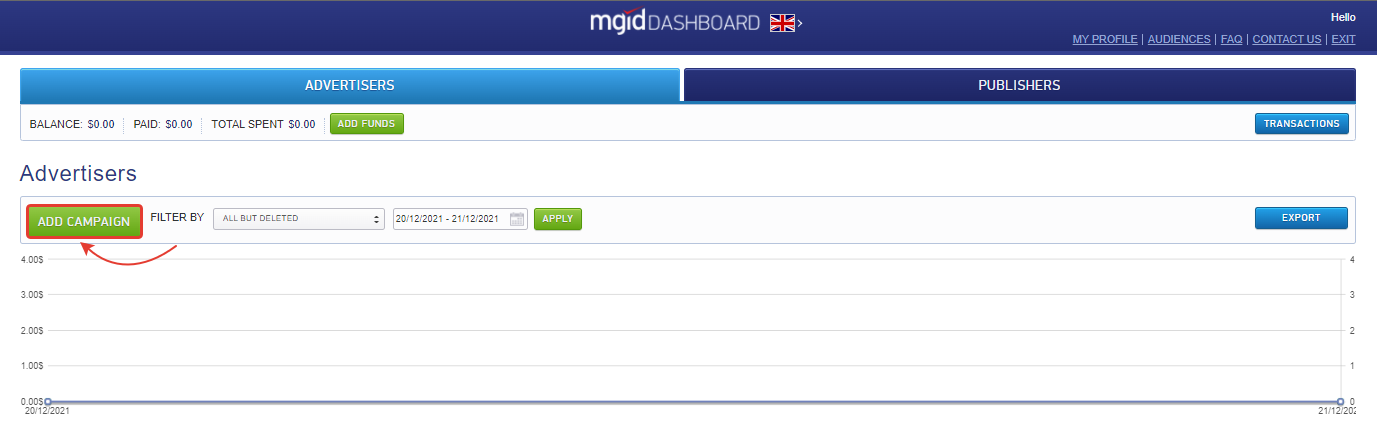
First, to set up BeMob tracker integration, you need either a preexisting advertising campaign or a newly created campaign within your MGID account.
Click on Add campaign button to create a campaign.
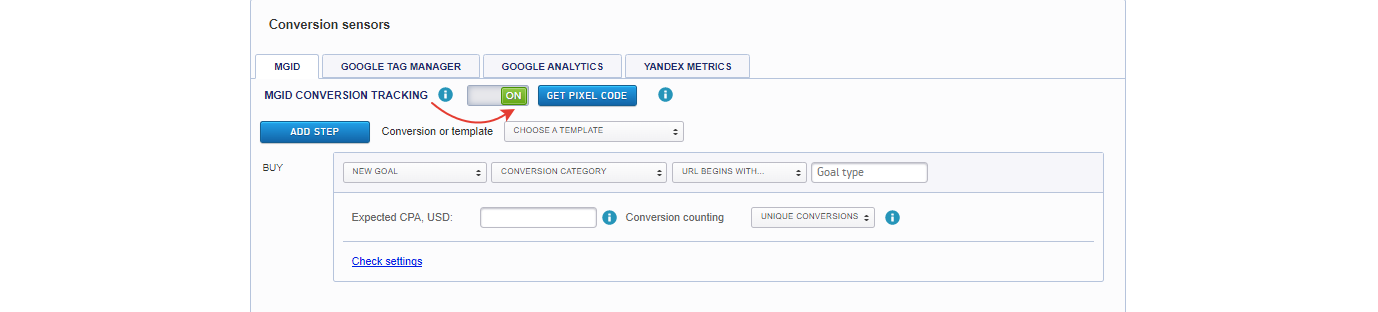
Go to the Conversion sensors section in the company’s settings and set the MGID conversion sensor to ON.
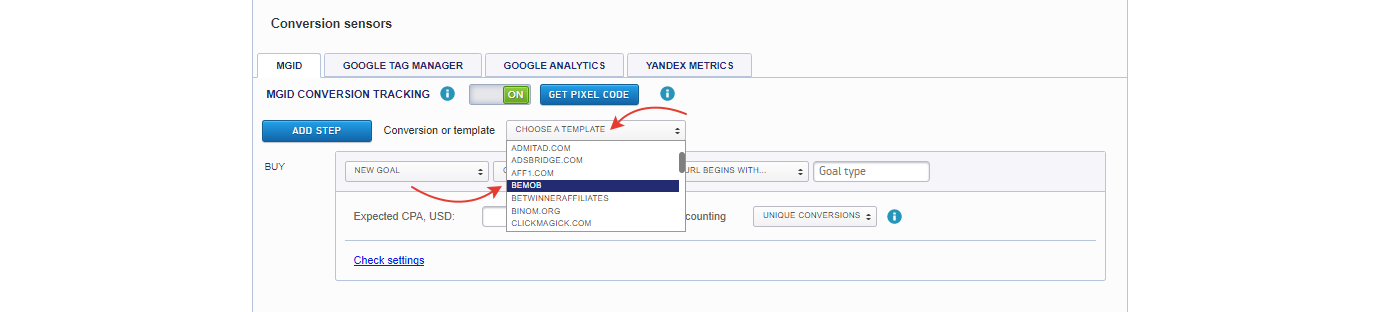
Select BeMob from the list of available templates.
When you select the BeMob template, postback links will be available for all conversion stages (Interest, Desire, Action).
You can use all or some conversion stages.
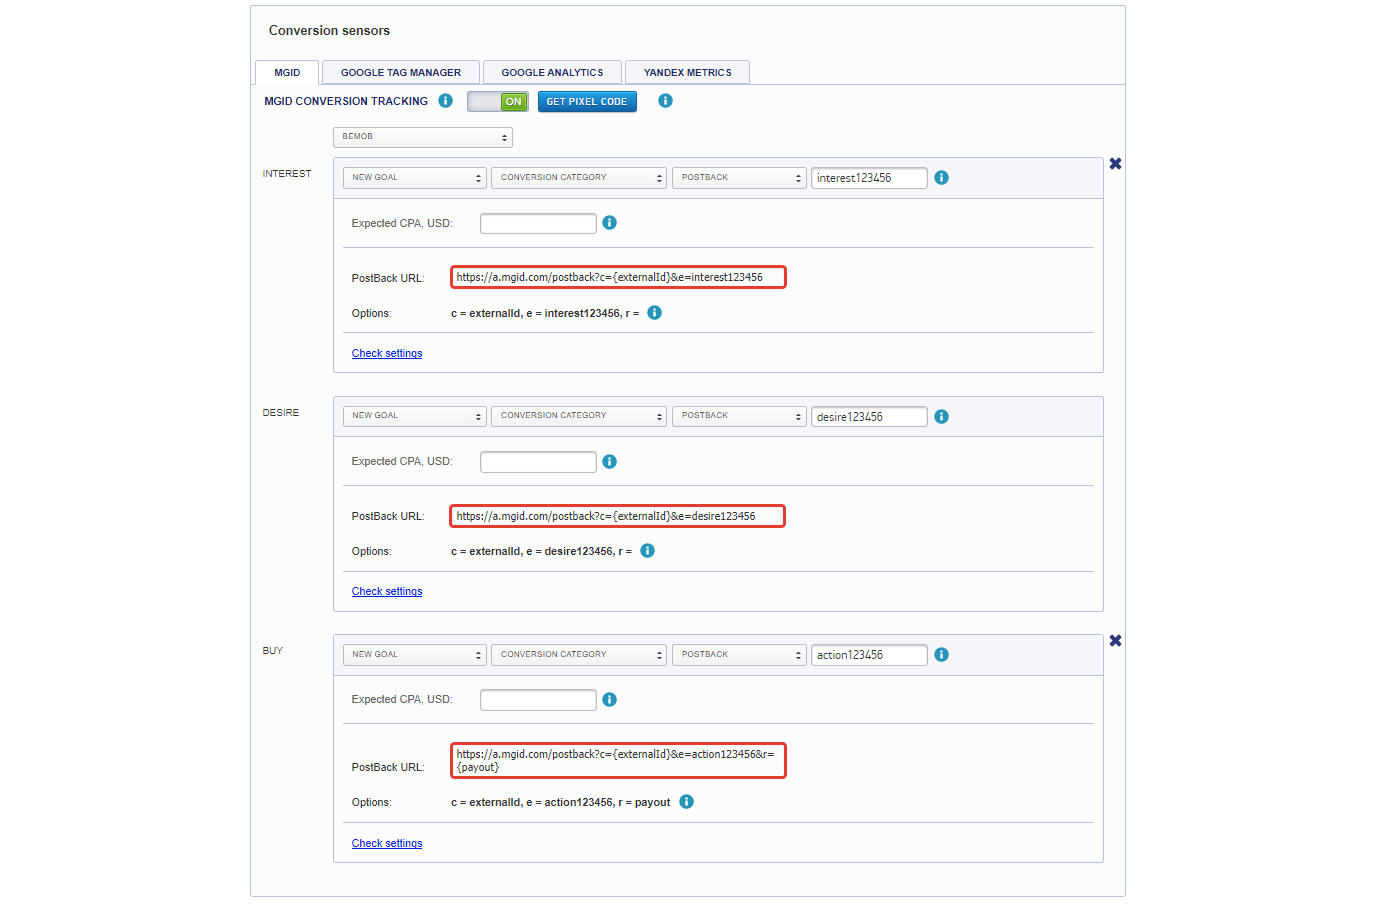
123456 is a unique parameter for our system (e.g. a company's ID) that will be transferred to BeMob with the conversion.
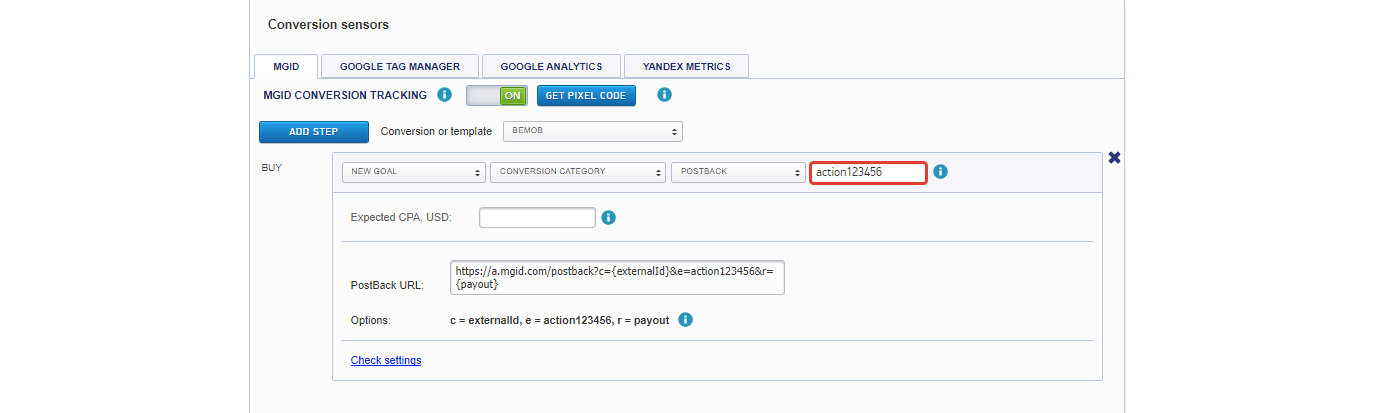
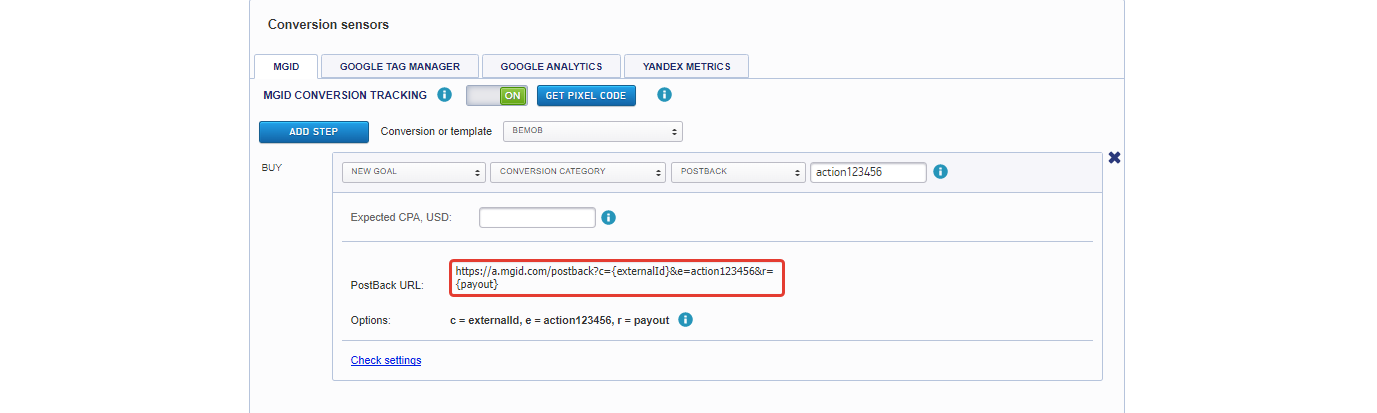
Copy the postback link from the field Postback URL and go to your BeMob account.
Set up on BeMob
2.1 Set up the MGID template
MGID is already configured as a traffic source template on BeMob.
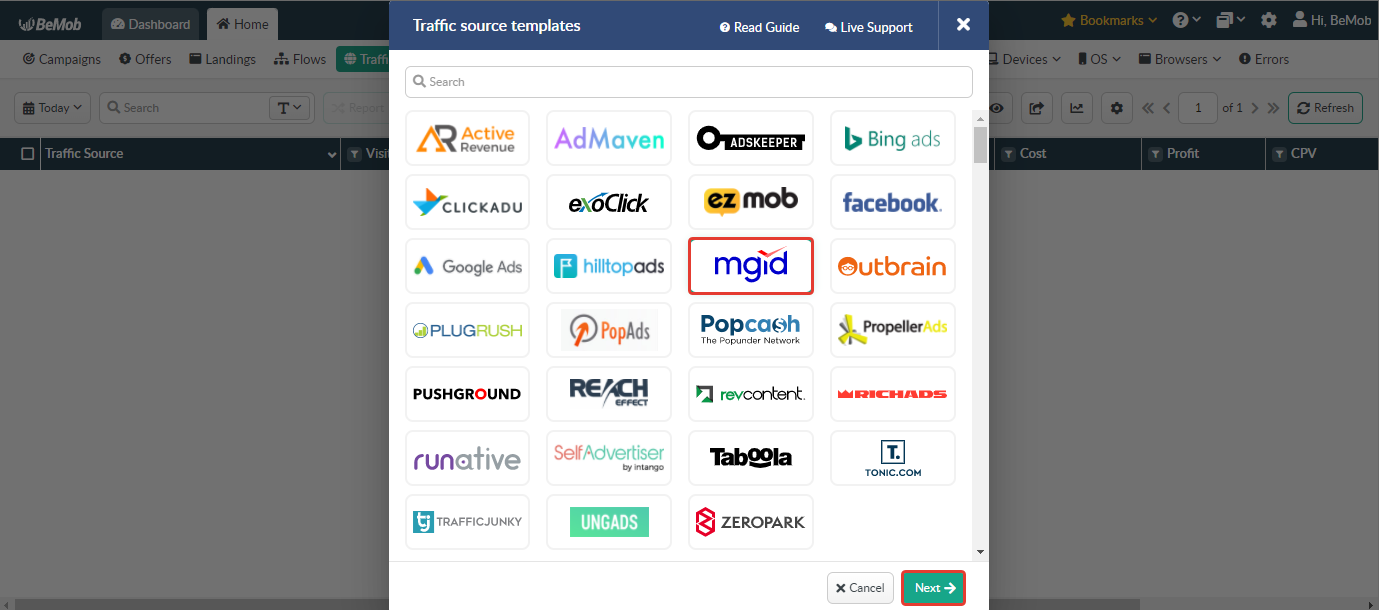
To add MGID from templates:
- Go to the Traffic Sources section.
- Click on Create From Template button.

3. Select MGID from the template list and click Next.
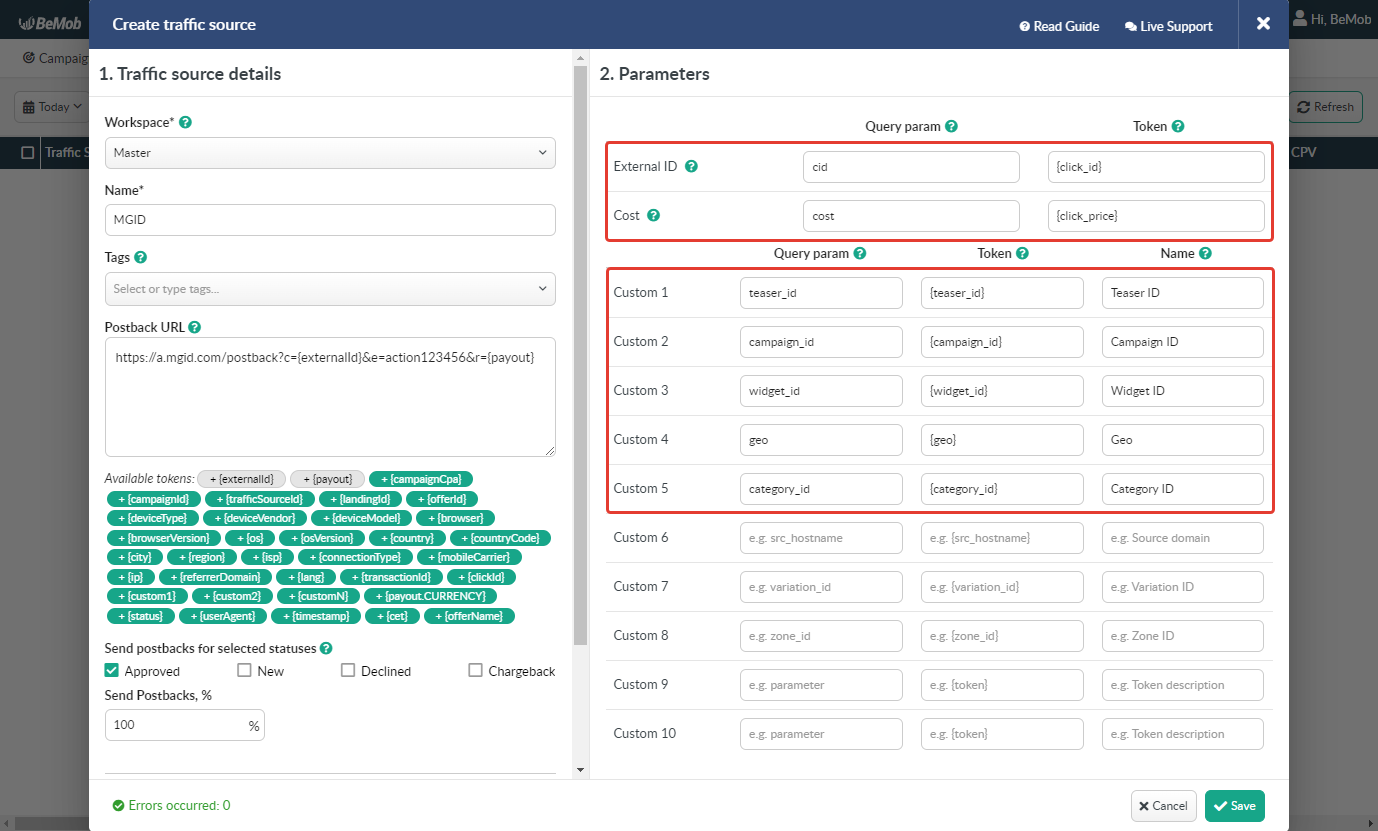
4. Paste copied Postback URL in the corresponding field.
Configured Postback URL should look like this:
https://a.mgid.com/postback?c={externalId}&e=new123456&r={payout}
- {externalId} is a special BeMob token that is used to transfer conversion ID.
- {payout} is a token used to transfer the payment amount per conversion.
- new123456 is a unique MGID parameter.

5. Select Approved status for setting Send postback with selected statuses. If this checkbox is empty, conversions will not be sent to MGID.

Tracking parameters and tokens supported by MGID are preconfigured in the template.
Please note! If you would like to pass data of conversion status to MGID, it is required to specify {status} along with your unique ID for e parameter in the Postback URL:
http://a.mgid.com/postback?e={status}123456&r={payout}&c={externalId}
In this case, you should mark Approved, New and Declined checkboxes.
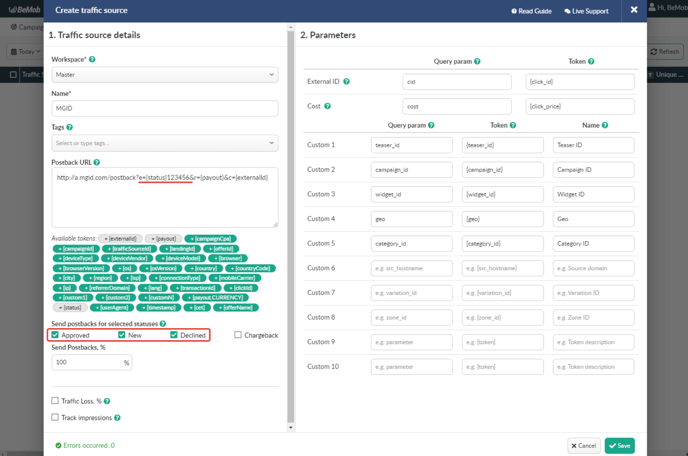
Tracking parameters and tokens supported by MGID are preconfigured in the template.
They are required to transfer traffic information to BeMob, such as teaser IDs, campaign IDs, widget IDs, etc.
2.2 Creating a campaign
To create a campaign on BeMob, follow these steps:
- Go to the Campaigns section.
- Click on the New button.

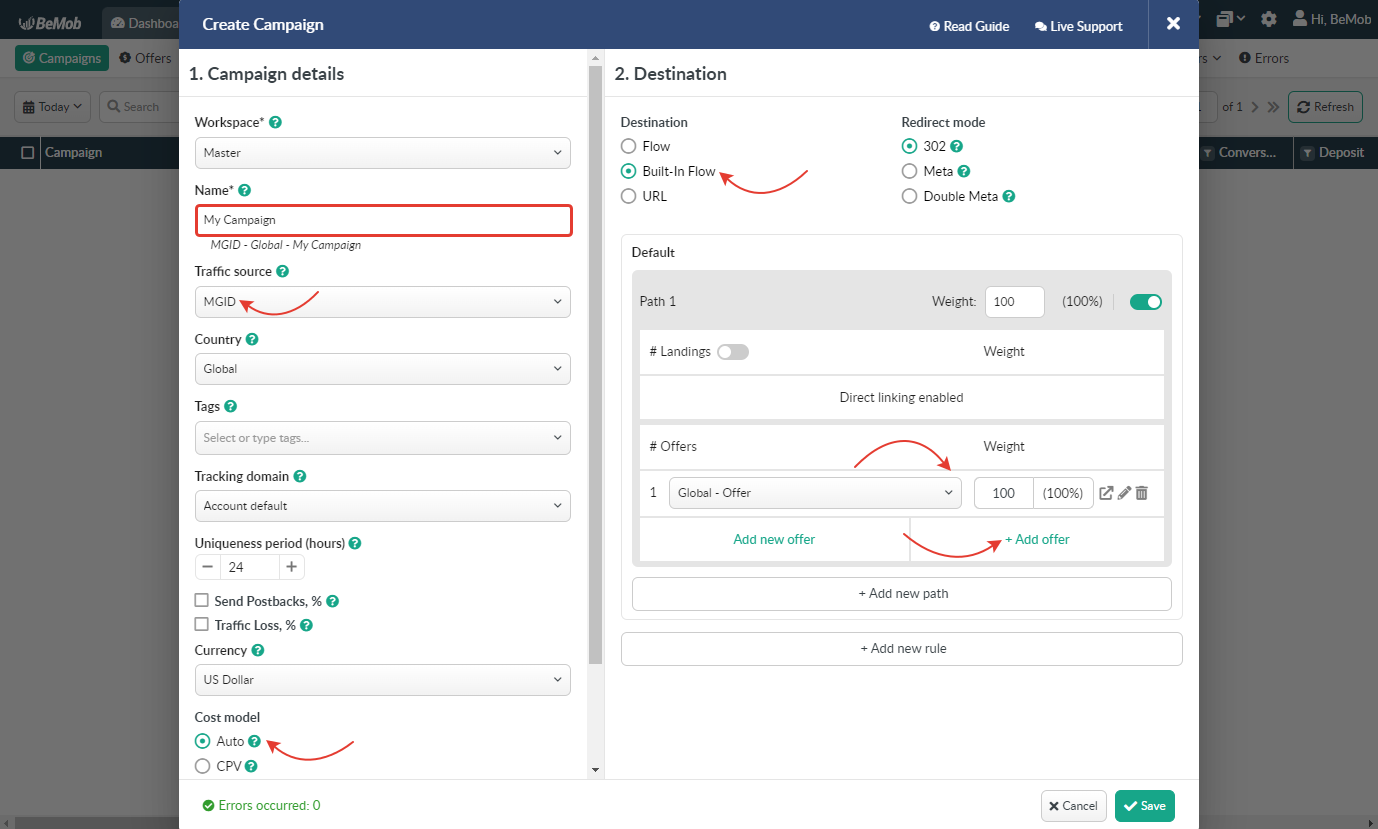
3. Enter the campaign’s name.
4. Select MGID as the traffic source.
5. Select Auto cost model — MGID automatically sends cost data via a custom parameter.
More information on cost models is available in this article.
6. Select the required traffic destination: Flow, Built-In Flow or URL.- Select Flow if you have previously configured landings and offers and set certain rules for traffic distribution.
- Select Built-In Flow if you want to use offers and landings in your campaign without creating a separate flow. This is an easy and simple way to create a campaign.
- Select URL as the campaign’s destination if you want to use your website’s link without creating a separate offer and landing in the tracker.
More information on the campaign’s destination settings is available here.
7. Add your offer from the list of previously configured offers.
8. Save the campaign’s settings.
A window with the Campaign Links will appear after saving the campaign’s settings.
You need to paste the Campaign URL link to MGID.

BeMob’s Campaign URL contains HTTP by default. Copy this link, paste it into your MGID account and add S: HTTPS.
Testing conversion transfer from BeMob to MGID
This option was created for clients to check if they have configured everything correctly.
Clicks are not calculated during testing, money is not debited for them and these clicks are not included in statistics.
You need to take the following steps to test conversion transfer from BeMob:
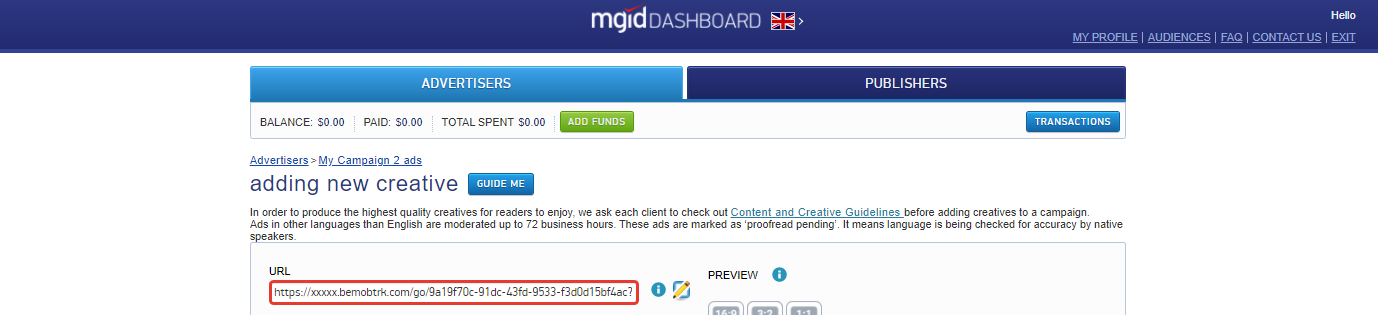
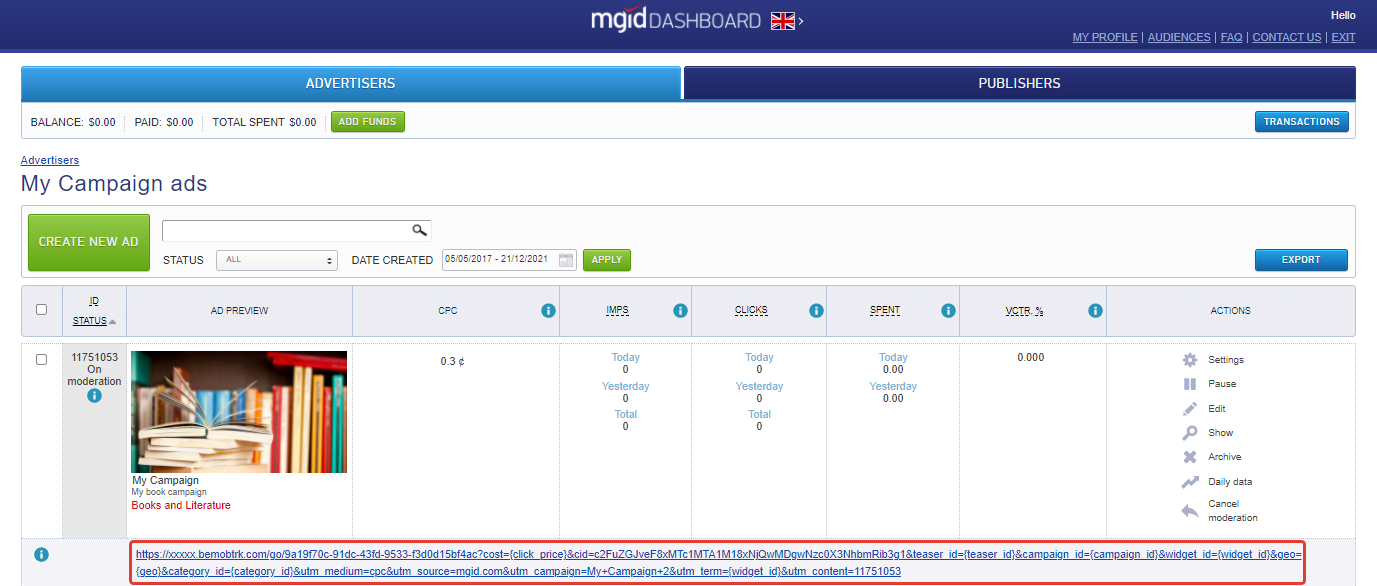
- Go to the Advertisements section and copy the link with a unique click ID.
2. Paste and follow this link in your browser.
3. Go to the section Live Visits/Live Clicks in your BeMob account to copy the click ID of your visit.

4. Paste the copied click ID in the postback link that you are going to use in your partner network.
For example: http://xxxxx.bemobtrk.com/postback?cid=MVCuypF3C2qGzhwFvo2tgf&payout=1
5. Copy and paste the postback link into your browser.
Test conversion will be available in the Conversions section of your BeMob account.

Information that a test conversion was transferred from BeMob to MGID will be available in the Postbacks section.
